
Before You Buy: Make Sure a Pellet Insert Fits Your Fireplace and Your Routine
Verify fireplace dimensions, chimney condition, venting, heat needs, complete installed cost, maintenance access, electrical supply and outage plans.
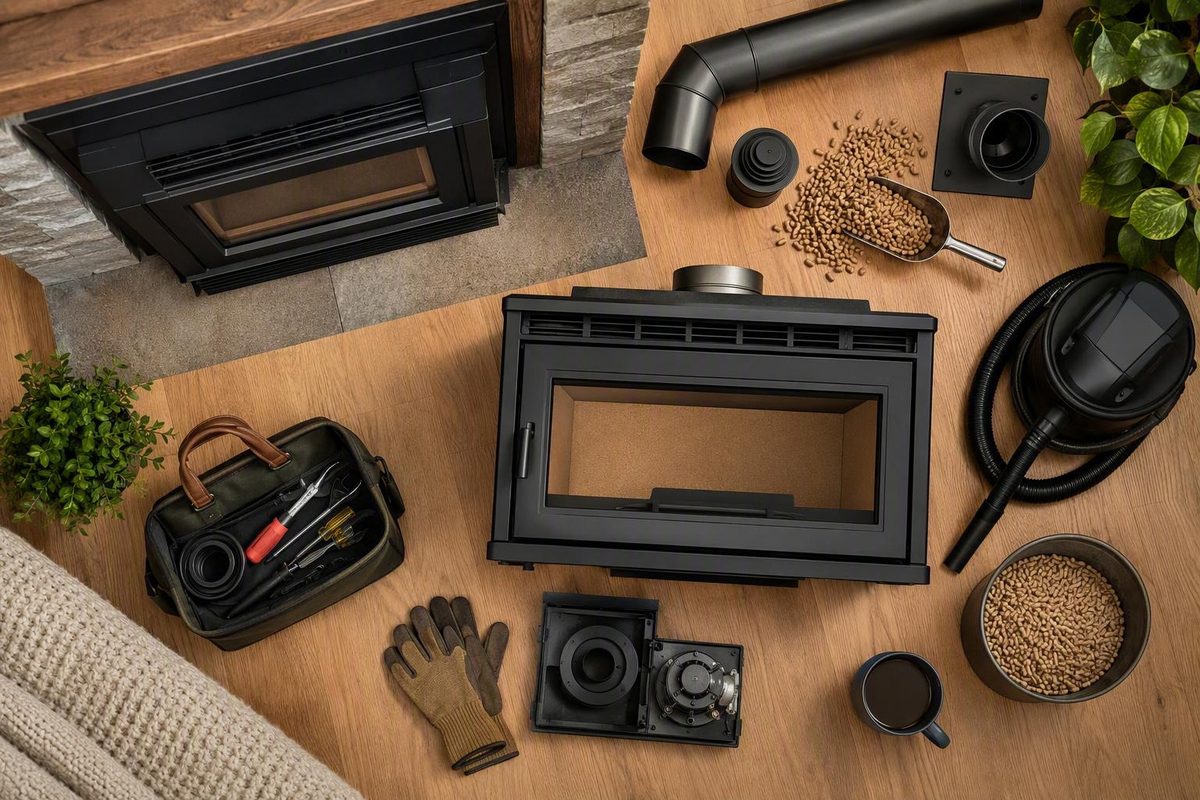
A pellet stove insert can convert a compatible fireplace into automated, thermostat-controlled space heat, but it is not a drop-in purchase. Before ordering one, verify the fireplace dimensions and listing, chimney condition, venting route, realistic heat requirement, complete installed cost, maintenance access, pellet storage, electrical supply, and outage plan. The exact current appliance manual and local requirements—not advertised square footage or the stove-only price—should control the decision.
The short answer: who should consider a pellet insert?
A pellet stove insert is a pellet-burning appliance designed for an existing compatible fireplace or an expressly approved built-in opening. Pellets sit in a hopper, a powered auger meters them into a burn pot, and combustion and convection fans manage the fire and move heat into the room. Electronic controls coordinate these components and, on equipped models, regulate output against a temperature setting.
The heating process resembles that of a freestanding pellet stove. The practical difference is installation: an insert must fit inside the fireplace, cover the opening with an approved surround, connect to an approved vent route, and remain accessible for filling, cleaning, and service. A freestanding stove occupies the room independently and may allow different placement and venting options.
| A pellet insert looks promising when… | Proceed cautiously when… |
|---|---|
| The fireplace type, opening, and chimney are compatible | The opening is unusually small, shallow, tapered, or damaged |
| There is dry space for bags of pellets | Chimney repairs have not been evaluated or priced |
| Electrical service is reliable or an approved backup is practical | Winter outages are frequent and backup power is unresolved |
| Filling, cleaning, and service access can be preserved | Surround, mantel, hearth, or service clearances are tight |
| Someone can lift, store, and pour pellet bags | Handling recurring 40-pound bags would be difficult |
| Qualified local installation and service are available | No local technician supports the model or stocks parts |
| The household accepts cleaning and operating noise | The goal is silent, passive, maintenance-free fireplace heat |
This is not a passive fireplace appliance. Conventional inserts need electricity for the auger, igniter, controls, and fans. They also require pellet handling, burn-pot and ash cleaning, and eventual replacement parts or professional service. Pellets commonly come in 40-pound bags, so the physical routine matters as much as thermostat convenience.
Do not assume an insert will heat the whole house. Its role depends on the exact model designation and output, the building’s heat loss, climate, insulation, room connections, and whether doors remain open. Some models may support a substantial heating role; others are designated only for supplemental heat. Check the current manual for the exact model rather than transferring a claim from another appliance.
Measure the fireplace before comparing models
Start with the fireplace, not the product catalog. The appliance body must fit inside the opening, while its faceplate or surround must cover the opening without violating required clearances to the mantel, walls, trim, flooring, or other combustible materials.
Print or copy this measurement checklist:
- [ ] Fireplace type: masonry or factory-built/prefabricated
- [ ] Front opening width
- [ ] Front opening height
- [ ] Rear firebox width
- [ ] Floor depth
- [ ] Depth at the top, especially if the rear wall slopes forward
- [ ] Hearth width and depth
- [ ] Mantel height and projection
- [ ] Distance to side trim, walls, flooring, and nearby combustibles
- [ ] Total area the surround must cover
- [ ] Chimney height and approximate liner route
- [ ] Flue dimensions and condition, if known
- [ ] Location of a grounded electrical outlet
- [ ] Access for hopper filling, ash removal, cleaning, and service
Measure at the narrowest points. Old masonry openings are not always square, and a sloping rear wall can reduce upper depth even when the firebox floor appears large enough. Photograph the fireplace front, firebox, damper area, hearth, mantel, outlet, and chimney exterior. Include a tape measure in the images where practical.
Identify the fireplace construction before assuming an insert is permitted. Masonry and factory-built fireplaces are not interchangeable installation situations. A factory-built fireplace may accept an insert only when the applicable appliance listing, fireplace documentation, and installation instructions permit the combination. Factory firebox components must not be cut or modified unless the governing documentation expressly allows it.
The Regency Greenfire GFi55-2 provides a useful worked example of how configuration changes fit. A third-party reproduction of its manual lists a minimum opening without the top-vent adapter of 26 inches wide and 15 inches deep. Listed height is 22.75 inches with the standard 55-pound hopper or 19.5 inches with the adjusted 42-pound configuration. It also lists a regular faceplate approximately 30 inches high by 39 15/16 inches wide and an oversize faceplate 33 inches high by 45 15/16 inches wide. With the top-vent adapter, the opening requirements change. These figures are model-specific and come from a reproduced document, so they should not be used for ordering until checked against the current manufacturer-issued manual for the exact appliance and configuration. See the reproduced GFi55-2 specifications and installation details.
The example illustrates two separate fit tests:
- The appliance must enter and sit correctly in the firebox.
- The approved surround must cover the opening while fitting around nearby trim and preserving required clearances.
A fireplace can pass the first test and fail the second. Conversely, a large surround may cover the masonry opening but conflict with a mantel, side trim, wall, or clearance requirement.
Take the completed worksheet, photographs, chimney details, and the fireplace make and model—if factory-built—to a dealer or installer before paying a deposit. Ask for written confirmation of the proposed insert configuration, surround, vent adapter, and fireplace compatibility.
Compare useful specifications—not maximum square footage
Advertised heating area is useful only as an initial filter. It does not account for outdoor design temperature, insulation, air leakage, ceiling height, window area, room layout, stairways, closed doors, fuel, installation quality, or the intended heating role.
A useful comparison sheet should include:
- Tested minimum-to-maximum heat output
- EPA higher-heating-value efficiency
- Certified emissions
- Hopper capacity
- Minimum and maximum burn rate
- Vent diameter and approved configuration
- Startup and running electrical demand
- Minimum fireplace-opening dimensions
- Surround sizes and combustible clearances
- Thermostat and control options
- Warranty terms and exclusions
- Replacement-parts availability
- Local technicians experienced with the model
Prioritize an output range over a maximum-BTU headline. Maximum output indicates potential capacity, but it does not guarantee that heat will move down a hallway, through closed doors, or to another floor.
The labels below matter because tested figures, manual-listed specifications, and conditional advertising claims are not interchangeable.
| Model | Output and performance | Fuel capacity or electrical figure | Evidence label |
|---|---|---|---|
| Regency GFi55-2 | 7,751–32,739 BTU; 1.8 g/hr; 75% EPA HHV when using the documented optional top-vent and 3-to-6-inch flue-adapter configuration | 55-pound standard or 42-pound adjusted hopper | Manual-listed in a third-party reproduction |
| Lopi AGP | 11,480–41,000 BTU | 40–70-pound hopper; 1.4–5 lb/hr | EPA-tested output; manufacturer-listed capacity and rate |
| ComfortBilt HP22i | Up to 2,800 sq. ft. in mild temperatures; up to 18 hours on low | 47-pound hopper | Conditional manufacturer claims |
| Vista Flame VF100 | Not used here for output comparison | Maximum stated electrical requirement of 520 watts | Model-manual-listed |
The Regency efficiency qualification is material: the reproduced manual ties the stated 75% EPA HHV figure to a particular adapter configuration rather than establishing it for every possible installation.
The Lopi AGP specifications identify an EPA-tested output range of 11,480–41,000 BTU, a 40–70-pound hopper, a 1.4–5-pound-per-hour burn rate, and 3-inch venting. ComfortBilt’s HP22i listing limits its 2,800-square-foot claim to mild temperatures and its 18-hour runtime claim to the lowest setting. Those conditions make the claims less useful for direct sizing than a tested output range and documented burn rate.
Efficiency also needs a consistent basis. Compare EPA HHV efficiency with EPA HHV efficiency rather than mixing it with LHV values, “up to” advertising, or estimates derived from similar heaters. Verify emissions and certification information for the exact model and configuration using current manufacturer or EPA documentation.
Standardized independent comparisons are not consistently available across the inserts discussed here, so the evidence does not support a definitive “best pellet insert” ranking. A defensible shortlist consists of models that fit the fireplace, modulate over an appropriate output range, have documented venting and electrical requirements, and can be serviced locally.
What installation normally involves
A pellet-insert project usually proceeds in this order:
- Inspect and clean the existing fireplace and chimney.
- Confirm that the appliance is approved for the fireplace type.
- Select the exact model, hopper configuration, surround, and vent arrangement.
- Obtain permits required by the jurisdiction.
- Route the specified liner through the chimney.
- Install the required adapters and seal the appliance connection.
- Preserve accessible cleanout points.
- Install the approved termination or chimney cap.
- Provide the required grounded electrical power.
- Address outside combustion air where the manual or local rules require it.
- Verify hearth protection and combustible clearances.
- Complete inspection, startup, control setup, specified draft or combustion checks, and owner instruction.
Pellet inserts commonly use a continuous chimney liner, but there is no universal liner diameter or arrangement. The reproduced Regency documentation, for example, specifies a continuous 3- or 4-inch liner to the chimney top, with 4-inch liner for runs longer than 25 feet. That is a model-specific example, not a rule for other inserts, chimney heights, offsets, or vent systems.
Outside-air requirements also vary. The same Regency documentation makes outside air mandatory for its installation in airtight homes and mobile homes and strongly recommends it more broadly. Another appliance or jurisdiction may impose a different rule. The exact manual, appliance listing, and site requirements must settle the question.
Exhaust connections must follow the purchased model’s sealing instructions, and flue-sharing restrictions must be observed. For example, the Vista Flame VF100 manual requires its exhaust system to remain sealed and airtight and prohibits sharing its chimney flue with another appliance. It also requires a grounded 115-volt, 60-hertz supply for that model. These are VF100-specific requirements, not universal specifications.
Professional installation is broadly advisable because the work combines a heavy appliance, concealed venting, electrical provisions, fireplace compatibility, listing restrictions, combustible clearances, permits, inspection, and commissioning. Incorrect fireplace modification, fit, vent routing, or sealing can create fire or carbon-monoxide hazards. The exact installer qualifications and permit obligations depend on the jurisdiction, appliance, and scope of work.
When interviewing installers, ask:
- Do you hold relevant hearth certification and all locally required licenses?
- Are you insured for this work?
- Have you installed and serviced this exact model?
- Who confirms compatibility with the existing fireplace?
- Who obtains permits and schedules inspection?
- What liner, adapters, sealants, cap, and cleanout arrangement are included?
- How will the appliance be removed or opened for future service?
- What commissioning tests and owner training are included?
- Does the installation satisfy the manufacturer’s warranty conditions?
- Do you stock or have reliable access to replacement parts?
Certification is useful, but it does not replace local licensing, model-specific experience, manufacturer instructions, or a complete written scope.
Budget for the complete project, not the advertised stove
An appliance price is only the beginning of the budget. Fireplace geometry, chimney condition, electrical access, surround selection, delivery difficulty, permits, and inspection can all change the installed total.
Use this fill-in worksheet:
| Project item | Quoted cost |
|---|---|
| Exact insert and configuration | $_____ |
| Faceplate, surround, or trim | $_____ |
| Chimney liner | $_____ |
| Adapters, cleanout parts, and sealants | $_____ |
| Chimney cap or termination | $_____ |
| Delivery and placement | $_____ |
| Installation labor | $_____ |
| Grounded outlet or circuit work | $_____ |
| Chimney cleaning | $_____ |
| Chimney or fireplace repair | $_____ |
| Hearth or clearance changes | $_____ |
| Outside-air components | $_____ |
| Permit and inspection fees | $_____ |
| Approved backup-power equipment | $_____ |
| Removal and disposal of an old appliance | $_____ |
| Taxes | $_____ |
| Contingency for documented chimney issues | $_____ |
| Total project | $_____ |
A September 2026 snapshot of cited sales pages illustrates the stove-only market, not a national installed-cost range. Fireside Hearth & Home listed five Harman and Quadra-Fire inserts with starting MSRPs from $4,068 to $6,049: the Quadra-Fire Santa Fe, Classic Bay 1200, Trekker, Harman P42i-TC, and Harman Accentra52i-TC. These were starting MSRPs rather than complete quotes. See the retailer’s pellet stove and insert listings.
In the same price snapshot, Luxury Fire displayed selected insert prices from $2,199 for the Breckwell Maverick to $4,691.75 for the True North TN40, with the Breckwell Blazer listed at $3,058.20. These retailer prices may exclude venting, surrounds, delivery, taxes, labor, and other required components. See the cited catalog.
ComfortBilt displayed a $2,799 sale price for both listed HP22i variants, reduced from $3,499. That was a changeable promotion, not a complete project quote; the same product page also attached conditions to its coverage and runtime claims.
Read price labels literally:
- Starting MSRP is not a dealer quote.
- Sale price may expire or depend on stock and terms.
- Product-page price may omit the surround, venting, delivery, or required accessories.
- Appliance price says little about chimney repair, electrical work, labor, permits, inspection, and taxes.
Do not substitute a freestanding-stove installation estimate for an insert quote. An insert may require a full chimney liner, damper-area work, specialized adapters, fireplace repairs, or a more difficult appliance connection.
Request an itemized written proposal naming the liner material, diameter, and length; surround; adapter and cleanout components; cap; electrical work; permits; commissioning; warranty labor; and assumptions about chimney condition. If unseen damage will be billed separately, ask how additional work will be documented, authorized, and priced.
Plan for pellets, refilling, and cleaning
Pellets commonly arrive in 40-pound bags. They need dry storage because moisture can make them swell or degrade. They must also be stored at the distance from the appliance specified in the current manual. Before buying, decide where a delivery will go, how bags will be carried inside, and whether the person operating the insert can safely lift and pour them.
Hopper capacity does not equal runtime. A basic theoretical estimate divides usable pellet capacity by the operating burn rate.
Using the Lopi AGP’s listed 40–70-pound hopper and 1.4–5-pound-per-hour burn rate:
- 40 pounds ÷ 5 lb/hr = 8 hours
- 70 pounds ÷ 1.4 lb/hr = 50 hours
Those are arithmetic endpoints, not guaranteed runtime. They pair the smallest load with the highest listed burn rate and the largest load with the lowest rate. Actual operation can differ with heat demand, fuel, feed calibration, cycling, usable hopper capacity, and installation. The inputs come from the manufacturer’s AGP product specifications.
Maintenance is better understood as a calendar than as one universal schedule:
| Interval | Typical work to plan for |
|---|---|
| Daily or near-daily when required | Check burn-pot air holes and remove airflow-blocking clinkers |
| Recurring during use | Remove ash, clean glass, and clean accessible heat-exchanger surfaces |
| Periodically | Check gaskets, intake paths, venting, and cleanout areas |
| Annually or at the manual’s interval | Professional inspection, deep cleaning, vent service, and component checks |
The exact schedule depends on the appliance, operating hours, and fuel. As a model-specific example, the Vista Flame VF100 manual calls for daily burn-pot-liner checks and exhaust inspection and cleaning semiannually or after every two tons of pellets. It also warns that high-ash fuel can require more frequent cleaning. Those intervals should not be transferred automatically to another model.
Allow ashes to cool and place them in a tightly covered metal container on a noncombustible surface away from combustible materials until final disposal.
Seasonal pellet consumption is household-specific. Climate, heat loss, thermostat setting, hours of operation, displaced fuel, and whether the insert is supplemental or carrying most of the heating load all matter. Build the storage and fuel budget around the intended use rather than a guaranteed number of tons.
Electricity, outages, and operating noise
Conventional pellet inserts depend on electricity for the auger, controls, igniter, combustion fan, and room-air fan. They normally stop operating during a power outage unless connected to a compatible backup arrangement approved for the appliance.
Obtain both startup and running electrical requirements before selecting a battery, inverter, power station, or generator. The VF100 example in the comparison table specifies grounded 115-volt, 60-hertz power, a 4.5-amp draw, and a maximum requirement of 520 watts. Another insert may have different startup behavior, shutdown needs, or power-quality requirements.
A generic “buy this size battery” recommendation is not appropriate for every insert. Check:
- Maximum and steady power demand
- Igniter startup load
- Required inverter waveform
- Grounding and neutral requirements
- Approved transfer or connection method
- Battery capacity at the relevant load
- Whether backup power permits a normal shutdown
- Generator placement and connection requirements
- Manufacturer approval and warranty implications
Ask the dealer what happens when utility power fails during a burn:
- Does fuel feed stop immediately?
- How are remaining smoke and combustion gases evacuated?
- Which backup systems are approved?
- How long will they operate during startup, low fire, high fire, and shutdown?
- Does third-party power equipment affect warranty coverage?
Noise is also part of the ownership decision. The auger and fans are moving parts, so mechanical and airflow sound is inherent. Hear the exact insert operating at low and high output in a showroom if possible, and listen for fan pitch, pellet-feed cycling, vibration, and cabinet resonance—not just flame appearance.
The final pre-purchase checklist
Do not sign until each item has a documented answer:
- [ ] The insert is listed and approved for the specific fireplace type.
- [ ] Front width, rear width, height, lower depth, and upper depth are verified.
- [ ] The selected surround covers the opening and preserves required clearances.
- [ ] The hearth and nearby combustibles meet the model’s requirements.
- [ ] The chimney has been inspected and necessary repairs are priced.
- [ ] Liner diameter, length, route, adapters, cap, and cleanout access are specified.
- [ ] The outside-air decision is documented.
- [ ] A correctly located grounded outlet is available or included in the work.
- [ ] Output is matched to a realistic heat-loss assessment and intended heating role.
- [ ] Dry pellet storage and routine bag handling are practical.
- [ ] Filling, cleaning, removal, and service access are preserved.
- [ ] An outage and safe-shutdown plan is in place.
- [ ] Permit and inspection responsibilities are assigned.
- [ ] Qualified local warranty and repair service are available.
The contract should identify the exact model and configuration, current manual revision, included and excluded labor, liner size and length, outside-air provision, cleanout design, electrical work, commissioning procedure, permits, inspection, warranty responsibilities, and future service availability.
Compare at least two itemized proposals using the same scope. A lower appliance price is not a lower project price if one proposal omits the liner, surround, permit, electrical work, chimney repairs, or commissioning.
Verify efficiency and emissions against current manufacturer or EPA documentation for the exact model and configuration. Check any rebate or incentive through the official program and confirm the exact model certificate before including it in the budget. Do not rely on an older buying guide for current eligibility.
Frequently asked questions
Can a pellet stove insert be the primary heat source for a home?
Possibly, but not by default. The answer depends on the exact model’s designation and output, a realistic calculation of the home’s heat loss, climate, floor plan, and how heat will reach rooms away from the fireplace. Some appliances are designated only for supplemental heating. Treat a separate heating system or outage plan as prudent household contingency planning unless the proposed insert, installation, and local requirements clearly support a larger role.
Can a pellet insert burn corn or other biomass fuel?
Only if the exact appliance and configuration are approved for that fuel. Many inserts are wood-pellet-only; the Vista Flame VF100, for example, specifies wood pellets only. Some multi-fuel appliances permit corn or grain blends under defined conditions and may require a particular grate, ignition method, or maintenance routine. Never infer alternative-fuel compatibility from the word “pellet” or from another model sold by the same brand.
Can a pellet insert go into a factory-built fireplace?
Sometimes. The insert listing, factory-built fireplace documentation, local requirements, and installation instructions must all permit the combination. The opening must also satisfy fit, surround, venting, hearth, and clearance requirements. Do not cut or remove factory firebox components unless the applicable documentation expressly authorizes the modification.
The practical decision rule is simple: buy only after the fireplace, chimney, heat requirement, complete cost, maintenance routine, and power plan all work on paper. If any one of those remains an assumption, the project is not ready for a deposit.