
How to Choose the Right Liner for an Existing Masonry Chimney
With an existing masonry chimney, a full-height liner is not always required. The stove manual, vent system, chimney condition and local rules govern the route.
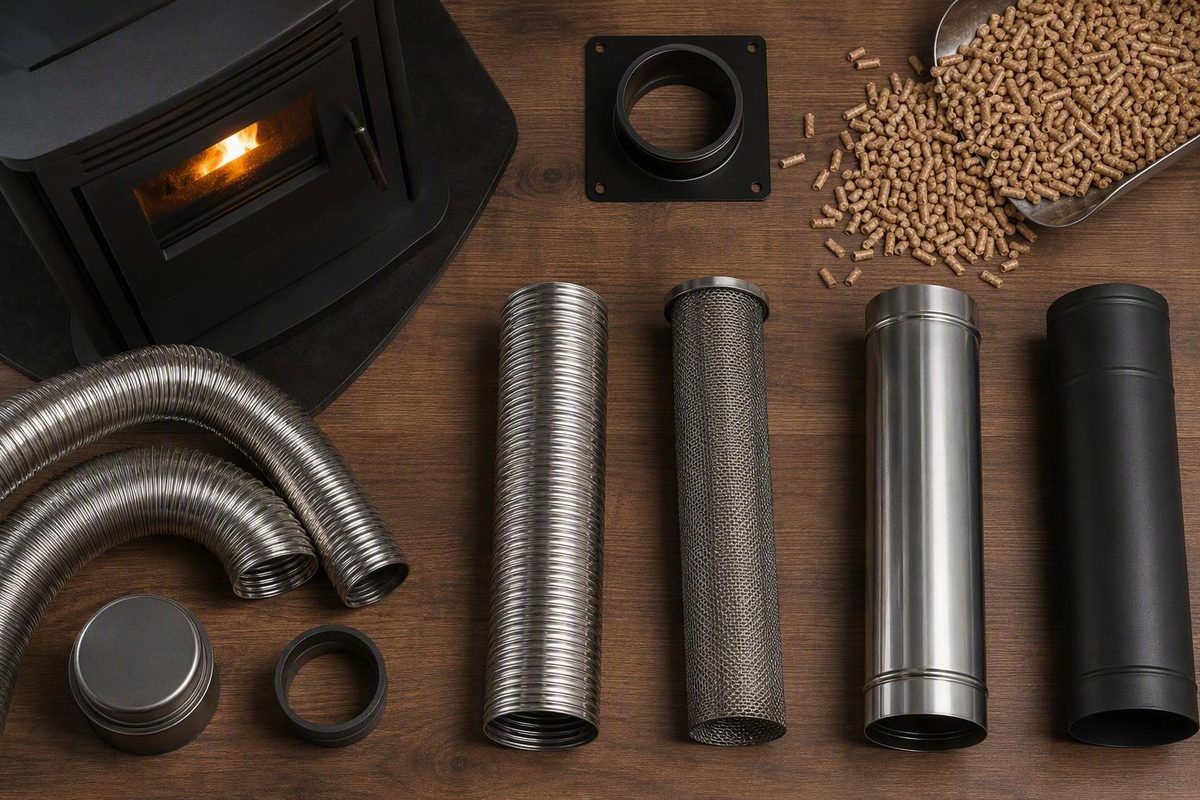
A pellet stove chimney liner should not be selected by a universal rule such as “use 4-inch stainless steel” or “match the 3-inch outlet.” The right system depends on the exact stove, the complete vent route, the chimney’s condition and dimensions, the approved vent components, and applicable permit and inspection requirements.
Start with the appliance manual—not a liner catalog. The manual should identify permitted vent types, explain any equivalent-vent-length calculation, and set limits for diameter, elbows, offsets, horizontal sections, and vertical rise. The selected vent or liner system’s instructions govern its components and installation. Local requirements may add permit or inspection steps.
This is a planning and purchase guide, not a substitute for those controlling documents or for an on-site chimney assessment. Retailer and forum sources can identify common concerns and available products, but they cannot approve a configuration for a particular stove or jurisdiction.
A practical buying sequence is:
- Identify the exact stove and exhaust outlet.
- Read the model-specific venting instructions.
- Inspect and measure the chimney.
- Map the entire vent route.
- Calculate the route using the stove manufacturer’s method.
- Select a complete, compatible vent or liner system.
- Verify every adapter, fitting, support, termination, and insulation requirement.
- Confirm permit, inspection, and commissioning requirements before installation.
Does a pellet stove need a chimney liner?
A pellet stove needs an approved route for combustion exhaust, but it does not necessarily need a conventional masonry chimney. Depending on the appliance and listed vent system, an installation may use a horizontal termination, a vertical metal vent, or an existing chimney. General pellet-stove guidance describes wall, roof, and existing-chimney routes while directing owners to the appliance manual for model-specific requirements (pellet-stove venting routes).
If you plan to use an existing masonry chimney, apparently intact clay tile does not by itself establish that the chimney can accept the proposed connection. The decision depends on:
- The stove manufacturer and exact model
- The appliance exhaust-outlet diameter
- The venting configurations permitted by the appliance manual
- The selected vent system’s instructions and documented fuel compatibility
- The masonry chimney’s condition
- The flue’s minimum internal dimensions and shape
- Chimney height, offsets, bends, and connection geometry
- Whether the chimney is interior or exterior
- Whether the chimney serves another appliance
- Applicable permit, inspection, and insurer documentation requirements
A full-height, correctly sized stainless-steel liner is commonly recommended by retailers and forum contributors when a pellet stove connects to a large masonry flue. The stated rationale is that the liner gives the appliance a continuous vent path closer to the size expected by its exhaust system. That is common market guidance, not proof that every clay-lined chimney legally requires a new liner.
The opposite assumption is also unsafe: visible clay tile should not be treated as proof that the entire chimney is suitable. General liner-planning guidance calls for checking the chimney for damage, deposits, obstructions, bends, access, and adequate dimensions before choosing or installing a liner (chimney-liner planning guidance).
A liner does not by itself guarantee:
- Acceptable exhaust performance
- Approval for the chosen stove
- Compliance with local requirements
- Compatibility among components
- Protection from chimney fires
- Freedom from future inspection and cleaning
Use this decision path before buying a kit:
- Identify the appliance. Record its manufacturer, exact model, serial information, outlet size, outlet position, and approved fuel.
- Read the venting section. Note permitted vent systems, diameter rules, route limits, equivalent-vent-length instructions, and requirements for chimney connections.
- Assess the chimney. Check its condition, deposits, obstructions, offsets, access, and available internal space.
- Map the route. Include the appliance connection, horizontal sections, tees, elbows, offsets, vertical sections, transitions, and termination.
- Calculate the route as instructed. Do not use vertical height alone when the manual requires an equivalent-length calculation.
- Choose a complete system. Verify the liner, adapters, tee, cleanout, supports, plates, cap, locking components, and any insulation together.
- Confirm approval steps. Determine whether permits, inspections, or insurer documents are required.
- Arrange final inspection and testing. Complete any draft, pressure, or operational checks required by the appliance and vent instructions before routine use.
The result may be a full-height liner, another approved vent route, or a permitted connection to the existing chimney.
Why an oversized masonry flue can be a problem
It is reasonable to ask why a smaller liner might help when a pellet stove already has an exhaust blower. A larger chimney appears to offer more room for gases to escape.
The concern is not simply whether the chimney has enough open area.
Forum contributors and chimney retailers commonly describe a large, cold flue—especially an exterior flue—as a potential obstacle to pellet-stove exhaust. In one Hearth.com discussion, participants attributed possible venting problems to the excess volume of an oversized masonry flue while distinguishing improved smoke removal from guaranteed fire prevention (discussion of oversized pellet-stove flues). This is practical forum guidance, not controlled engineering evidence, and it cannot override the stove manual.
An exhaust blower also does not make route resistance irrelevant. The complete route can include:
- Vertical and horizontal vent sections
- Elbows, tees, and offsets
- Abrupt transitions
- Cold exterior exposure
- Poorly joined or leaking sections
- Deposits or obstructions
- The volume of the existing flue
- Product-specific internal construction
This is why vertical height alone is an incomplete sizing shortcut. A straight vertical route and another route of the same height containing a horizontal connector, tee, and several elbows are not equivalent configurations.
Many pellet-stove manuals address route resistance through equivalent vent length, usually abbreviated EVL. Instead of counting only physical length, an EVL method accounts for route features such as horizontal sections and fittings. The values and limits can vary by appliance, so a formula copied from an unrelated stove should not be applied to yours.
A correctly selected liner may provide a continuous and more appropriately sized exhaust path. Those possible benefits do not mean that a liner prevents chimney fires or eliminates maintenance.
Pellet systems can accumulate ash, soot, and other deposits; solid-fuel liner guidance also identifies potentially flammable creosote as an inspection and cleaning concern. Follow the stove and vent manufacturers’ inspection and cleaning instructions rather than assuming that pellet exhaust leaves the system deposit-free.
How to choose between a 3-inch and 4-inch liner
The stove manual and its route-sizing method control this choice. The exhaust collar is an important starting measurement, but it is not enough by itself.
Pellet venting is commonly available in 3-inch and 4-inch diameters. A manufacturer-oriented support guide describes 3-inch venting as normally sufficient while noting that longer runs or routes with several bends may require 4-inch venting. It attributes the difference to the greater internal space and lower exhaust resistance of 4-inch pipe, especially through bends and elbows, and directs owners to the applicable manual’s EVL guidance (3-inch versus 4-inch pellet venting).
The defensible general rule is:
- A short, simple route may be permitted to remain 3 inches.
- A longer or more restrictive route may require 4 inches.
- The applicable threshold must come from the appliance documentation.
Four-inch pipe has more internal area than 3-inch pipe, but that does not make an automatic increase appropriate for every installation. The appliance and selected system still need an approved transition, and the complete route must comply with the instructions for both.
Generic retailer recommendations may be more categorical. One retailer recommends 4-inch liner for pellet stoves vented vertically into masonry chimneys and specifically identifies vertical runs exceeding 15 feet as requiring 4-inch pipe. It also favors rigid 304L for straight chimneys and smooth-wall flexible liner where bends prevent rigid installation (retailer masonry-chimney guidance). Those recommendations may help identify products to investigate, but they do not establish a universal 15-foot rule.
Sizing worksheet
Complete this worksheet from actual measurements and the exact stove manual:
| Input | Your installation |
|---|---|
| Stove manufacturer | |
| Exact model | |
| Manual revision or publication date | |
| Approved vent-system type | |
| Appliance exhaust-outlet diameter | |
| Outlet position: rear, top, or other | |
| Outlet angle, if applicable | |
| Vertical rise from connection to termination | |
| Total horizontal length | |
| Number and type of elbows | |
| Tee included in route | |
| Number and geometry of offsets | |
| Chimney interior or exterior | |
| Site elevation, if addressed by the manual | |
| Manual’s EVL allowance | |
| Calculated EVL for the actual route | |
| Diameter required at calculated EVL | |
| Approved transition from outlet to liner |
Do not invent missing EVL values. If the manual does not clearly address the proposed masonry-chimney route, ask the appliance manufacturer or a qualified hearth professional for configuration-specific guidance.
A liner generally should not be smaller than the appliance flue connection unless the applicable appliance and vent-system instructions explicitly permit that arrangement. A specialty retailer likewise advises following manufacturer recommendations and not selecting a liner smaller than the connected appliance’s flue size (3-inch liner compatibility guidance).
Before choosing 3 or 4 inches, document the answers to four questions:
- Does the appliance manual permit that diameter?
- Does the actual route remain within the manual’s EVL or other route limit?
- Is the selected vent or liner system documented for the appliance and fuel?
- Can the chimney accommodate the complete assembly, including fittings and any required insulation?
Only then should diameter become a shopping filter.
Liner, pellet vent, Class A chimney, and connector pipe are not the same
Product terminology is a common source of ordering mistakes. Different products may share a nominal diameter while having different wall construction, joints, adapters, listings, and intended uses.
For this masonry-chimney scenario, a chimney liner is the continuous vent installed inside the existing flue. Depending on the selected system, it may be rigid or flexible and may require dedicated top and bottom components.
Pellet vent is a vent system made for pellet-burning appliances. It is commonly available in 3-inch and 4-inch sizes and may be used in approved horizontal or vertical configurations.
Class A chimney is an industry term commonly used for insulated factory-built chimney systems. It is not another name for pellet vent or flexible masonry liner.
Connector pipe connects an appliance to an approved vent or chimney where that use is permitted. Ordinary wood-stove connector pipe should not be assumed suitable for pellet exhaust.
A retailer’s pipe guide distinguishes pellet vent from factory-built chimney and wood-stove connector pipe. It also says that pellet vent may terminate horizontally or vertically and warns against mixing brands unless the manufacturer permits it (guide to chimney and vent product categories). Treat these as distinct product systems rather than interchangeable pieces of generic metal pipe.
Conceptual freestanding-stove configuration
A freestanding stove connected to an existing masonry chimney might be arranged conceptually as follows:
Pellet stove
    │
Approved appliance adapter or connector
    │
Tee ── removable cleanout cap
    │
Full-height liner inside masonry flue
    │
System-specific top support or plate
    │
Approved termination and rain cap
This diagram shows possible functions, not a universal parts list. The actual installation may use another adapter, support arrangement, locking method, or termination. Clearances, joint treatment, supports, and termination requirements must come from the applicable instructions.
A tee may be useful where a rear or horizontal appliance connection must turn upward while preserving bottom cleanout access. Some stove outlets are angled or confined, however, and may require a model-appropriate adapter instead.
Conceptual fireplace-insert configuration
A pellet insert has different connection geometry:
Pellet insert in fireplace opening
    │
Approved appliance adapter
    │
Approved flexible section through damper or smoke-shelf area
    │
Approved transition, if required
    │
Vertical liner or permitted vent system
    │
Top support or plate and approved cap
The damper area and smoke shelf may prevent a straight rigid connection. Flexible venting may provide a route around that obstruction before an approved transition to the vertical system. Whether that arrangement is permitted—and where a transition may occur—depends on the appliance and vent-system instructions.
Do not assemble a vent system by matching diameters alone. Two components labeled “4-inch” can use different joints, wall construction, adapters, or sealing methods. Mix brands or product families only when the applicable system documentation expressly authorizes the combination.
Choosing material and construction
Alloy labels look like a simple quality hierarchy, but the complete system matters more than the alloy name by itself.
Before comparing materials, verify:
- Intended appliance and fuel
- Product documentation and listing information
- Permitted installation method
- Wall construction
- Approved fittings and transitions
- Required support and termination components
- Insulation requirements
- Compatibility among components
- Instructions for bends, joints, inspection, and cleaning
Retailers market certain 316L and 316Ti stainless-steel liners for wood-pellet fuel. Rockford Chimney Supply, for example, offers round, oval, square, rectangular, smooth-wall, and pre-insulated flexible configurations and identifies selected 316L and 316Ti products for pellet use (stainless flexible liner configurations). These are vendor compatibility claims, not approval for a particular stove, chimney, or jurisdiction.
Another retailer recommends rigid 304L for a straight pellet-stove chimney. The supplied evidence does not establish 304L as universally superior or approved for every pellet appliance. Product construction, documented fuel use, route geometry, and system instructions all remain relevant.
Construction comparison
| Construction | Route suitability | Bend tolerance | Marketed pellet compatibility | Installation constraints | Verify before purchase |
|---|---|---|---|---|---|
| Rigid stainless steel | Straight, accessible flues | Low | Some products are promoted for pellet applications | May not pass significant offsets; sections need compatible joints and support | Alloy, fuel documentation, joints, fittings, support, insulation, cleaning access |
| Conventional flexible stainless steel | Masonry flues with offsets; some insert routes | Higher than rigid | Certain 316L and 316Ti products are marketed for pellets | Must pass the route’s narrowest point; bend limits and construction vary | Bend limits, wall construction, fuel compatibility, adapters, route limits |
| Smooth-wall flexible stainless steel | Offset routes where less exposed internal corrugation is desired | Product-dependent | Sold in pellet-liner configurations | Construction and dimensions vary; may cost more than basic flex | Listing information, actual dimensions, bend limits, fittings, cleaning instructions |
| Pre-insulated stainless steel | Routes where the selected system or installation calls for insulation | Product-dependent | Available in configurations marketed for multiple fuels | Larger finished dimensions may complicate passage through tight flues | Finished dimensions, clearance, insulation specification, supports, top and bottom components |
Rigid liner may be practical in a straight chimney. Flexible liner is often the workable option when the route includes offsets or must pass a fireplace smoke shelf.
“Smooth wall” describes a commercial construction with less exposed internal corrugation than conventional flex. The label alone does not prove a particular efficiency or cleaning advantage. Compare the documented inside diameter, bend limits, fittings, and cleaning instructions.
Pre-insulated liner is also commercially available, but its availability does not mean insulation is mandatory in every masonry chimney. The requirement may depend on the selected system, chimney construction, available space, and approved installation method.
Insulation is separate from the metal liner and does not replace it.
Fuel compatibility requires particular care. A retailer describes certain 316L stainless and stainless flexible products as suitable for pellet appliances while describing its aluminum category for specified natural-gas or propane applications. Products documented only for gas service should not be assumed suitable for solid-fuel pellet exhaust.
The useful buying question is not simply “Is 316Ti better than 316L?” It is:
Is this complete system documented for my pellet appliance, fuel, vent route, chimney, and required components?
What to inspect and measure before ordering
Begin with the chimney, not the shopping cart. A new liner should not be used to conceal a condition that requires assessment or repair.
The pre-purchase assessment should address:
- Cracked, displaced, or deteriorated masonry or clay tile
- Deposits requiring removal
- Obstructions or nesting material
- Route accessibility
- Significant or inaccessible offsets
- Previous appliance connections
- Available space for the liner and any required insulation
- The fireplace throat and smoke shelf, if applicable
- Chimney-top condition and access
General liner guidance warns that improper installation can create fire, property-damage, and personal-injury risks and recommends inspection, measurement, code review, and appropriate technical knowledge before work begins. It characterizes homeowner installation as possible in some cases but complex and potentially hazardous when performed incorrectly.
Relining should therefore be treated as part of a complete chimney and vent assessment—not as proof that damaged masonry or an unsuitable route has been made acceptable.
Measurement worksheet
| Measurement or observation | Record |
|---|---|
| Stove make and exact model | |
| Exhaust-collar nominal and outside diameter | |
| Collar location | |
| Collar angle | |
| Distance from outlet to chimney entry | |
| Proposed adapter or tee depth | |
| Horizontal connector length | |
| Height from connection to termination | |
| Extra length required by system instructions | |
| Flue shape: round, square, rectangular, oval, irregular | |
| Minimum internal width | |
| Minimum internal depth | |
| Narrowest observed point | |
| Number and location of offsets | |
| Approximate offset geometry | |
| Smoke-shelf dimensions, if applicable | |
| Damper or throat restriction | |
| Chimney location: interior or exterior | |
| Existing clay-liner condition | |
| Other appliance openings into the chimney | |
| Roof and chimney-top access conditions |
Measure the minimum internal dimensions along the route, not only the opening at the top. An offset, damaged section, or other restriction may be narrower than the visible top opening.
Treat finished liner dimensions as product-specific information to verify. Do not assume a nominal 4-inch liner, its fittings, or an insulated assembly will pass through a perfect 4-inch opening. Obtain dimensioned drawings for the actual system and compare them with the chimney’s narrowest point.
Record whether the chimney is interior or exterior. Forum guidance repeatedly identifies tall, cold, exterior masonry flues as a possible exhaust-flow concern. That observation may inform the site assessment, but it does not replace the appliance’s sizing method.
Freestanding-stove measurements
For a freestanding pellet stove, record:
- Rear- versus top-outlet position
- Outlet angle
- Space behind the appliance for an adapter or tee
- Clearance needed to remove a cleanout cap
- Height and location of the chimney entry
- Horizontal connector length
- Any immediate elbow before the vertical liner
- Access for securing and inspecting the appliance connection
Do not assume that a tee will fit because it appears in a kit photograph. Compare the component’s dimensioned drawing with the available space behind the stove.
Insert measurements
For a pellet insert, also measure:
- Fireplace opening width and height
- Firebox depth
- Insert outlet location
- Damper opening
- Smoke-shelf depth and obstruction
- Offset from the outlet to the vertical flue
- Space for the required adapter
- Service and removal access
- Cleanout and inspection access
A flexible section may be needed to negotiate the smoke shelf, but its use and any transition must be permitted by the appliance and selected vent system.
Determine whether the chimney serves—or previously served—another appliance. Do not assume that flue sharing is permitted. Record every opening and obtain a configuration-specific determination from the appliance documentation and relevant local authority.
Document checklist
Collect the following before ordering:
- Exact appliance manual
- Any manufacturer venting supplement
- Selected vent-system installation instructions
- Product listing and fuel-compatibility information
- Dimensioned component drawings
- Chimney inspection findings
- Photographs of the flue, connection area, smoke shelf, and termination
- Completed EVL worksheet
- Permit and inspection information
- Insurer-requested documents, if applicable
- Written manufacturer clarification for unresolved questions
Avoid filling gaps with generic clearances or termination dimensions taken from unrelated retailer pages. Such figures may belong to another product, appliance, or jurisdiction.
What a complete liner kit may need—and what drives the cost
The word kit does not mean complete for your installation. It means the seller has bundled a particular group of components.
Depending on the appliance and system, the project may need:
- Correctly sized liner
- Appliance adapter
- Tee body and tee snout
- Removable cleanout cap
- Bottom support or plate, where applicable
- Approved transition components
- Couplers or locking bands
- Top plate
- Top support or clamp
- Rain cap or approved termination
- System-required insulation
- Manufacturer-specified joint materials
- Accessible cleaning components
Kits vary substantially. One marketplace listing describes a 4-inch-by-25-foot flexible stainless-steel pellet-stove kit containing the liner, tee, top plate, and cap, but it does not establish the alloy, insulation, listing, or compatibility with a particular stove (example pellet-liner kit listing).
Customizable specialty-retailer kits may offer choices among adapters, tees, plates, caps, shapes, smooth-wall construction, and pre-insulation. That flexibility is useful only when the selected components form an authorized system.
Nominal diameter does not establish compatibility. Do not attach a 4-inch component from one product family to a 4-inch liner from another simply because the pieces appear to fit. Check part numbers and system instructions or obtain written manufacturer confirmation.
Cost framework
Build the budget around the complete installation:
| Cost category | What can change it |
|---|---|
| Liner | Diameter, usable length, shape, alloy, wall construction |
| Construction | Rigid, conventional flex, smooth-wall flex, pre-insulated |
| Insulation | Product type, length, finished dimensions, installation method |
| Bottom connection | Adapter, tee, snout, cleanout cap, support |
| Top termination | Plate, clamp, support, cap, weather-management components |
| Transitions | Appliance-specific or vent-to-liner adapters |
| Chimney preparation | Inspection, cleaning, obstruction removal, repairs |
| Installation | Access, offsets, height, insert removal, roof work |
| Approval | Permit and inspection charges |
| Delivery | Freight, oversized-package charges, destination |
| Purchase total | Taxes, consumables, access equipment, changed components |
Retail prices are volatile seller-page snapshots rather than market averages. Because the supplied listings do not provide a documented observation date for a reliable comparison, exact figures are not reproduced here.
The product pages still illustrate why headline prices are difficult to compare. A home-improvement retailer lists smooth-wall stainless pellet-stove kits in different lengths, while specialty sellers offer conventional flexible, smooth-wall, and pre-insulated configurations (smooth-wall pellet-liner listing). These are not equivalent products, and the pages do not establish their suitability for a particular installation.
Shipping can materially affect marketplace comparisons. The least expensive advertised liner may exclude an adapter, insulation, cleanout access, chimney preparation, freight, professional work, permits, or inspection.
Compare quotations on the same basis:
- Required diameter
- Usable liner length
- Documented material and construction
- Insulation status
- Bottom connection
- Top support and termination
- Cleanout provision
- Shipping and taxes
- Chimney preparation
- Installation, permit, inspection, and commissioning scope
The meaningful number is the total installed cost of a documented system, not the lowest price for a coil of stainless steel.
Installation, commissioning, and ongoing maintenance
This section is for planning and purchase oversight, not step-by-step installation. Lowering a liner into a chimney is only one part of the work. The installer must understand chimney condition, vent-route limits, appliance clearances, approved joints, supports, cleanout access, termination, and applicable local requirements.
Homeowner installation may be possible in some circumstances, but it is neither universally appropriate nor universally prohibited. The difficulty differs greatly between a short, straight, accessible flue and a tall chimney with offsets, deteriorated tile, a confined fireplace throat, insulation questions, or difficult roof access.
Qualified chimney or hearth assistance is particularly prudent when:
- The chimney is damaged or its condition is uncertain
- Deposits or obstructions are present
- The liner diameter is unclear
- The manual does not address the proposed route
- Appliance and vent-system instructions appear to conflict
- The chimney has offsets
- An insert must pass a difficult smoke shelf
- Insulation requirements are unresolved
- Components from different systems are being considered
- Roof access or fall exposure is involved
- A permit or inspection is required
- Problems occur during initial operation
Commissioning checklist
Before routine use, confirm that:
- The chimney has been assessed and cleaned as necessary.
- Identified repairs have been addressed.
- The liner diameter follows the appliance’s sizing method.
- The liner and fittings are documented as compatible.
- The appliance adapter or tee is appropriate for the model.
- Cleanout access is present and usable.
- Joints and connections follow the selected system’s instructions.
- Required supports and locking components are installed.
- Any required insulation is correctly configured.
- Appliance and vent clearances have been checked.
- The termination follows the applicable instructions.
- Required permits and inspections have been completed.
- Draft, pressure, or operational testing required by the appliance has been performed.
- Startup, normal operation, and shutdown have been checked as directed by the appliance manual.
Do not begin routine use merely because the stove lights. Commissioning should establish that the appliance and exhaust system operate together as intended.
A liner does not eliminate maintenance. Ash, soot, creosote, and other deposits may collect in the appliance, connector, tee, cleanout, liner, or termination. Inspection and cleaning remain necessary, and accumulated material can restrict the exhaust route.
Follow the stove and vent manufacturers’ maintenance intervals. Usage, fuel, appliance settings, route geometry, and observed deposits can affect the work required, so a universal schedule would be misleading.
Retain a permanent installation file containing:
- Appliance manual and serial information
- Vent-system instructions
- Product and component information
- EVL calculations
- Receipts and part numbers
- Permit documents
- Chimney inspection findings
- Installation photographs
- Final inspection record
- Draft or operational test results
- Cleaning and maintenance records
- Manufacturer correspondence
These records can make later servicing, component replacement, property transfers, and insurer questions easier to resolve.
Frequently asked questions
Does every pellet stove connected to a masonry chimney need a full-length liner?
Not necessarily. A pellet stove needs an approved exhaust route, but whether an existing masonry chimney requires a new full-height liner depends on the appliance manual, selected vent system, chimney condition and geometry, and applicable local requirements.
A full-height stainless-steel liner is commonly recommended for a large, tall, cold, or exterior masonry flue because it can provide a continuous, more appropriately sized vent path. That recommendation does not prove that every intact clay-lined chimney can—or cannot—be used without relining.
Have the chimney assessed, calculate the complete route as the stove manual directs, and complete any required approval process before choosing the configuration.
Can I use a 3-inch liner if my pellet stove has a 3-inch exhaust outlet?
Possibly, but the outlet diameter alone does not answer the question. A short route with few bends may remain within the stove’s limits at 3 inches. A longer route with horizontal sections, elbows, or offsets may require 4 inches.
Use the exact manual’s EVL or other route-sizing method. Do not apply a universal conversion point from another stove or a retailer article. The liner generally should not be smaller than the appliance outlet unless the applicable instructions expressly permit it.
Does a pellet stove chimney liner need insulation?
Sometimes, but not universally. The answer may depend on the selected liner system, chimney construction, available space, installation method, and applicable requirements.
Pre-insulated liners are commercially available, as are separate insulation products for compatible liner systems. Insulation does not replace the metal liner. Verify whether it is required, optional, or prohibited for the exact configuration, and confirm that the completed assembly will pass through the chimney’s narrowest point.
Is flexible or rigid liner better for a pellet stove?
Neither is universally better.
Rigid liner may suit a straight, accessible chimney. Flexible liner is often more practical where offsets, a damper area, or a fireplace smoke shelf prevent a straight route. Smooth-wall flexible products provide another construction option, but the label alone does not prove superior performance.
Choose according to route geometry, then verify fuel compatibility, product documentation, bend limits, fittings, insulation requirements, and appliance approval.
Can a homeowner install a pellet stove chimney liner?
A homeowner may be able to install some systems, but liner installation is not automatically an appropriate DIY project. It can involve chimney inspection, route calculations, system-specific joints, appliance clearances, insulation, cleanout access, roof work, permitting, and operational testing.
Professional assistance is especially appropriate for damaged chimneys, uncertain sizing, offsets, difficult insert connections, unresolved insulation questions, roof access, or conflicting instructions. Whoever performs the work must follow the appliance and vent-system documentation and complete the applicable inspection and commissioning process.
Final purchase sequence
Do not begin with an alloy, diameter, or advertised kit price.
- Identify the exact stove.
- Read its venting section and any manufacturer supplement.
- Inspect and measure the chimney.
- Map every section, elbow, tee, and offset.
- Calculate the route using the manual’s method.
- Select a complete system documented for pellet fuel and the proposed configuration.
- Verify every fitting, support, termination, and insulation requirement.
- Confirm permit and inspection steps.
- Arrange final inspection and commissioning before routine use.
The right pellet stove chimney liner is the one documented for the actual appliance and route—not simply the cheapest kit or the diameter most often recommended online.