
How to Plan a Pellet Vent System That Fits Your Stove and Route
Appliance approval and local rules decide whether the route can end at a side wall, rise outside, pass through the roof or use an approved chimney liner.
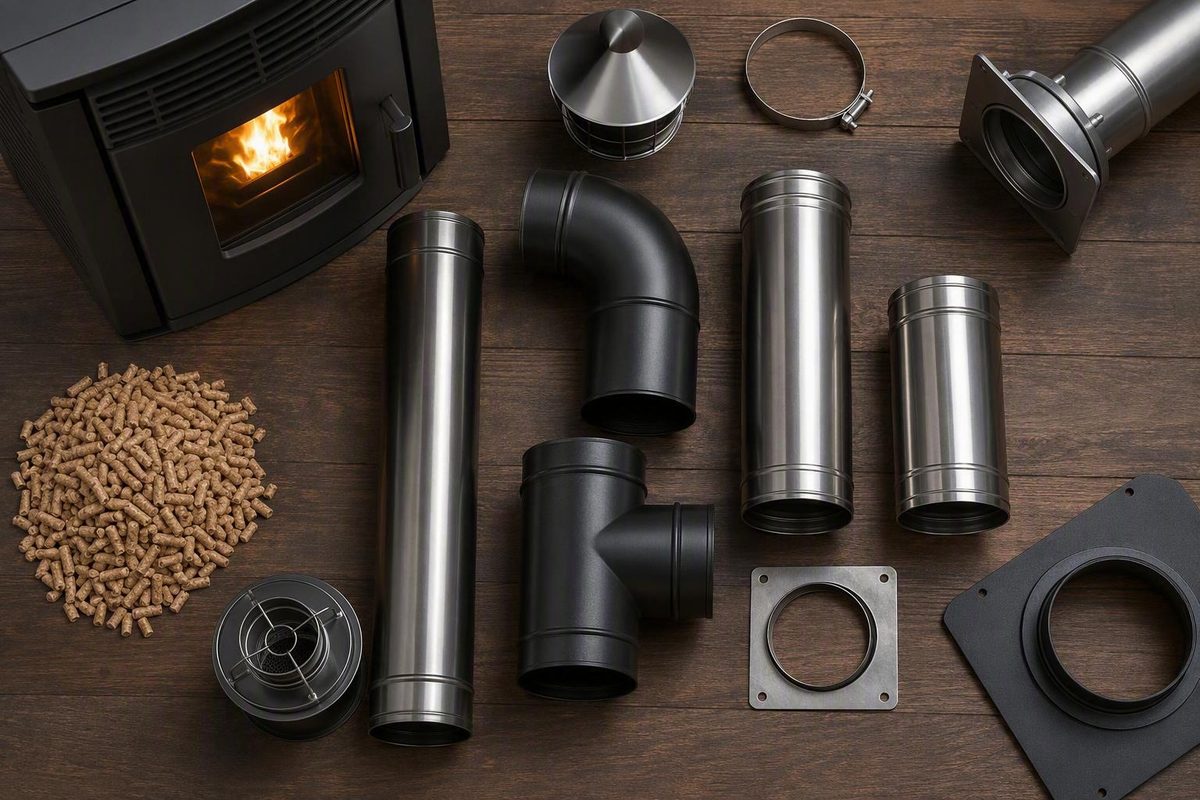
Choosing a pellet stove exhaust pipe is not simply a matter of measuring the stove outlet and ordering pipe with the same diameter. The vent is a complete assembly: pipe, fittings, adapters, penetration components, supports, termination, joint seals, and cleaning access must all match the appliance and the proposed route.
Start with the exact stove installation manual—not a generic diagram or retail kit description. Confirm the permitted vent type and diameter, sketch the complete route, apply the stove manufacturer’s sizing or Equivalent Vent Length method, and then choose compatible components from one vent product line.
Safety boundary: This is a purchasing and planning guide, not an installation specification. The appliance instructions, vent-system instructions and label, applicable permit and inspection rules, and the local authority’s requirements must all be satisfied. If sizing, routing, penetrations, listings, or local requirements remain uncertain, consult a qualified installer and the relevant building or fire authority before buying or modifying components.
What Pellet Stove Exhaust Pipe Is—and What It Is Not
A pellet stove exhaust pipe is the venting system that carries combustion gases and smoke from the appliance to the outdoors. Although shoppers often call the whole assembly “pipe,” a functional system usually includes straight sections, fittings, an appliance adapter, penetration protection, supports, a termination cap, and a practical way to inspect and clean the route.
In North America, listed Type L or L-vent is commonly used for pellet appliances, but that does not mean every pellet stove accepts every Type L product. The exact appliance manual identifies the permitted vent type for that model. Common pellet vent construction includes a stainless-steel inner wall, an air space, and a protective galvanized or galvalume outer wall, although the materials and construction must be verified for the exact product. Forge & Flame describes this common construction while emphasizing that the required diameter depends on the appliance rather than one universal size for all pellet stoves.
Commercial venting guidance describes pellet exhaust as mechanically pressurized, which is why the connections must use the locking method, factory gaskets, or approved sealant prescribed for the selected system to maintain sealed joints. Do not assume that one sealing method applies to every brand or every connection.
Ordinary single-wall stovepipe or generic double-wall wood-stove connector pipe should not be substituted merely because it appears to fit. Use only venting that the appliance instructions and vent manufacturer approve for the application. A specialty retailer likewise distinguishes pellet-rated vent from ordinary wood-stove pipe and directs buyers to the applicable manufacturer instructions for installation, sealing, and maintenance requirements.
The exhaust vent must also be distinguished from the outside-combustion-air system. An outside-air kit brings combustion air toward the appliance through a separate hose or duct and exterior hood. It does not carry exhaust and cannot replace the pellet vent. Retailers may display the two systems together, but they serve opposite airflow functions.
Common shopping terms include:
- Appliance adapter or stove adapter: Connects the stove’s exhaust collar to the first component in a particular vent system.
- Pellet vent: The approved system of pipe, fittings, supports, penetration components, and termination parts used to carry exhaust outdoors.
- Chimney liner: An approved liner—often stainless steel—routed through an existing chimney or fireplace flue.
- Wall thimble or wall pass-through: A system-specific assembly intended for the vent’s passage through a wall.
- Termination cap: The component at the outdoor end of the vent. Horizontal and vertical caps are not necessarily interchangeable.
- Outside-air intake: A separate combustion-air hose or duct, adapter, and exterior hood where required or permitted.
- Increaser: An approved fitting that changes the vent from one inside diameter to another, commonly from a 3-inch appliance outlet to a 4-inch vent.
- Chimney adapter: A fitting connecting pellet vent to an approved chimney-system interface.
- Liner adapter: A fitting connecting the appliance or pellet vent to an approved chimney liner.
Treat each item as a component of a specific system, not as generic hardware.
How to Choose Between 3-Inch and 4-Inch Pellet Vent
Three-inch and 4-inch inside diameters are common North American retail categories for pellet vent. Retail pipe is commonly classified by inside diameter, but matching the diameter alone does not establish that a product is approved for the stove or compatible with adjacent parts. Northline Express, for example, organizes pellet vent into both sizes and states that stove and chimney pipe is selected by inside diameter.
The correct starting point is the exact appliance installation manual. Check:
- Approved vent type
- Appliance outlet connection
- Permitted diameter or diameters
- Maximum route limits
- Allowances or penalties for elbows, tees, and other fittings
- Required diameter changes
- Elevation guidance
- Permitted termination configurations
- Outside-air requirements, if any
Do not borrow fitting values from another stove manual or from a generic online example.
A 4-inch vent offers less resistance to exhaust flow than a 3-inch vent, particularly in longer routes and at bends. A manufacturer may therefore require the larger size for a sufficiently long or complex route. ComfortBilt’s support guidance makes that comparison but directs owners to the applicable stove manual and its EVL provisions for the actual decision between 3-inch and 4-inch venting.
That does not make 4-inch vent automatically better. It may cost more, occupy more space, and require different adapters and penetration components. More importantly, a larger diameter does not make an otherwise prohibited route acceptable. Correct sizing means following the stove manufacturer’s design rather than buying the largest available pipe.
A stove with a 3-inch exhaust outlet can still have an approved route using 4-inch vent. In that case, a listed 3-to-4-inch increaser makes the transition at the location specified by the applicable instructions. The fitting implements an approved design; it does not override route limits.
Use this decision sequence:
- Record the stove manufacturer, exact model, and manual revision.
- Confirm the approved vent type and outlet connection.
- Sketch the entire route from the outlet to the terminal.
- Record every straight section, elbow, tee, adapter, and direction change.
- Apply the manual’s EVL calculation or sizing table.
- Apply the manual’s elevation guidance.
- Confirm that the proposed route and termination orientation are permitted.
- Select the approved diameter and any required increaser.
- Choose one compatible vent product line in that diameter.
A simple blank EVL worksheet can help organize the calculation without importing unsupported generic values:
| Route component | Quantity | Value from the stove manual | Subtotal |
|---|---|---|---|
| Straight vertical vent | |||
| Straight horizontal vent | |||
| 45-degree elbows | |||
| 90-degree elbows | |||
| Tees | |||
| Other fittings named by the manual | |||
| Total EVL |
Retail descriptions conflict over which diameter is “typical.” Some call 3-inch common; others describe 4-inch as typical while acknowledging that certain stoves require 3-inch. That disagreement is a useful warning against substituting retail generalizations for model-specific instructions.
UK shoppers may encounter 100 mm pellet-flue terminology. That belongs to a different product and regulatory context and should not be casually converted into a North American recommendation. A UK installation must follow the appliance instructions, compatible flue documentation, and applicable UK requirements.
Choose the Vent Route Before You Build the Parts List
The route determines how much straight pipe is needed and which fittings, supports, penetration assemblies, termination parts, and cleaning-access components belong on the order.
Four broad configurations cover many installations:
- Side-wall termination
- Side-wall penetration followed by an exterior vertical rise
- Interior vertical run through the ceiling and roof
- Approved liner through an existing chimney
A pellet stove does not necessarily need a masonry chimney, but its combustion gases still need an approved route outdoors. Commercial installation guidance identifies wall, exterior-rise, through-roof, and existing-chimney arrangements as possible configurations, subject to the stove and vent instructions for the particular installation.
| Route | Common planning concerns | Components often added |
|---|---|---|
| Direct side wall | Wall construction, wall thickness, terminal location, exterior obstacles, permitted horizontal length | Wall pass-through, horizontal cap, support |
| Wall plus exterior rise | Clean-out access, weather exposure, direction changes, exterior support | Tee, vertical lengths, wall supports, vertical cap |
| Interior through roof | Every ceiling, floor, attic, insulation area, and roof opening | Ceiling support, firestop or shield, flashing, storm collar, vertical cap |
| Existing chimney | Liner approval, adapters, fireplace geometry, top support and termination | Stainless-steel liner, liner adapter, top plate or support, cap |
Side-wall termination
A short side-wall route can look simple, but it still requires careful planning. Start at the appliance outlet and account for:
- Appliance adapter
- Indoor pipe orientation
- Wall construction and total thickness
- Framing and concealed services
- Listed wall pass-through
- Exterior siding, trim, and obstructions
- Support and assembly space
- Terminal location
- Inspection and cleaning access
Confirm that the appliance permits the proposed configuration, especially if it is horizontal-only.
A vertical section is commonly recommended because it may improve natural draft and help move exhaust during shutdown or a power interruption. That is commercial guidance, not a universal minimum; the permitted arrangement and required height must come from the appliance instructions, vent instructions, and applicable local requirements.
Side-wall penetration with an exterior rise
This route passes through an exterior wall and then turns upward. Compared with a direct side-wall termination, it usually adds a tee or elbow, vertical pipe, exterior supports, weather exposure, and a vertical cap.
Plan every direction change and identify where ash can be removed without dismantling an inaccessible section. Select and space exterior supports according to the chosen vent system’s instructions rather than a generic interval.
Interior vertical route through the roof
An interior vertical run may provide a relatively direct exhaust path, but it is not simply straight pipe plus a cap. Evaluate every ceiling, floor, concealed space, attic, insulation area, and roof penetration separately.
Depending on the vent system and building, the route may call for a ceiling support, firestop or joist shield, attic insulation shield, roof flashing, storm collar, braces or other supports, and a vertical termination.
Existing chimney or fireplace insert
An insert or freestanding stove using an existing masonry chimney commonly relies on an approved stainless-steel liner. The parts plan may include an appliance adapter, liner adapter, a flexible section specifically approved for the configuration, chimney-top support or weathering hardware, and a compatible top termination.
Commercial installation guidance describes a typical insert arrangement as a stainless-steel liner lowered through the chimney, connected at the appliance with a suitable adapter, and capped at the chimney top as one connected route. The exact liner extent, support, connection, and termination must be verified in the appliance and liner-system instructions.
Before ordering, draw a route sketch showing:
- Stove model and outlet location
- Straight lengths
- Every bend, tee, adapter, and diameter change
- Horizontal and vertical orientation
- Every wall, floor, ceiling, attic, and roof penetration
- Wall or floor thickness
- Proposed support locations
- Terminal orientation
- Windows, doors, air intakes, decks, grade, and nearby equipment
- Cleaning and inspection access
That sketch becomes the basis for the sizing calculation and bill of materials.
Route-by-Route Pellet Vent Parts Checklists
Product names vary among manufacturers. Verify each component’s function, part number, diameter, and compatibility within the chosen vent line.
Pellet vent component glossary
- Straight sections: Fixed-length vent sections used to build the route.
- Adjustable or slip sections: Approved components that accommodate a stated range of length and simplify alignment. They do not authorize arbitrary field modification.
-
45-degree elbow: Changes direction by 45 degrees and affects the route calculation as specified by the stove manufacturer.
-
Tee with clean-out cap: Changes direction while providing removable access at the lower branch where the configuration permits.
- Appliance adapter: Connects the stove outlet to a particular vent product line.
- Diameter increaser: Changes from a smaller approved vent diameter to a larger approved diameter.
- Wall thimble or pass-through: A listed, system-specific component used where vent passes through a wall.
- Wall support: Carries or stabilizes an exterior or vertical run.
- Firestop or joist shield: A system-specific component used at designated floor or ceiling passages.
- Attic insulation shield: Maintains the separation required by the selected vent system where insulation is present.
- Ceiling support: Carries weight or maintains the position of a vertical assembly at a ceiling.
- Flashing: Weathers the roof opening around the vent.
- Storm collar: Helps shed water around the vent above the flashing.
- Liner adapter: Connects the appliance or pellet vent to an approved chimney liner.
- Horizontal cap: Terminates a permitted side-wall route.
- Vertical cap: Terminates a vertical vent or liner route as specified.
One manufacturer’s product catalog illustrates the breadth of a vent system: pipe and slip sections, elbows, tees, adapters, increasers, caps, supports, shields, wall pass-throughs, and liner connectors are offered for different route configurations within the same product family.
Basic through-wall checklist
A basic side-wall plan commonly prompts consideration of:
- Appliance adapter
- Approved straight vent sections
- Tee or elbow if specified
- Adjustable section if approved and needed
- Listed wall thimble or pass-through
- Required support or mounting components
- Matching horizontal termination
- Prescribed gasket or sealant materials
- Approved cleaning access
Do not assume that the shortest physical route is permitted. Verify the horizontal-run limit, sizing result, any required rise, and terminal location first.
Through-wall with exterior vertical rise checklist
Begin with the through-wall categories, then consider:
- Clean-out tee or another approved accessible section
- Exterior vertical pipe lengths
- Elbows or tees for every direction change
- Wall supports from the same product system
- Any prescribed base, bracket, or load-bearing component
- Exterior finish appropriate to the selected product
- Listed vertical termination
- Space to remove the clean-out cap and brush the route
Avoid placing a clean-out where it cannot be opened or serviced without removing major parts of the assembly.
Through-ceiling and roof checklist
A vertical roof route may require:
- Appliance adapter
- Straight vent sections
- Approved offsets and elbows
- Ceiling support or support box
- Firestop or joist shield at applicable passages
- Attic insulation shield where applicable
- Additional supports or bracing
- Roof flashing matched to roof conditions
- Storm collar
- Listed vertical cap
- Accessible inspection or clean-out point below concealed sections
A component suitable for a wall passage is not automatically appropriate for a ceiling, attic, or roof. Use the part specified for each condition by the selected vent-system instructions.
Insert or masonry-chimney checklist
An insert or chimney route may require:
- Appliance-specific outlet adapter
- Approved stainless-steel liner in the required diameter
- Liner or chimney adapter
- Flexible section specifically approved for the configuration
- Liner support or top hardware
- Chimney-top plate or weathering components
- Compatible vertical termination
- Accessible connection and cleaning point
- Components needed for the existing fireplace geometry
Do not buy generic flexible duct or assume that every stainless-steel liner is suitable for pellet exhaust. Confirm the liner’s approved use, diameter, adapters, and compatibility with the appliance and route.
Horizontal and vertical caps are distinct route components. Select the termination made for the chosen orientation and product system.
Retail kits can illustrate the types of components a route may need, but they are not universal bills of materials. A kit may omit the exact appliance adapter, additional length, support, increaser, penetration part, sealant, flashing, or termination required by the actual installation.
Plan cleaning access during the buying stage. A clean-out tee or reachable removable section is generally easier to incorporate before purchase than after the stove is operating.
Compatibility: Why the Same Diameter Does Not Mean the Parts Fit
Two components marked “3 inch” may share a nominal inside diameter and still be incompatible. Vent systems can differ in:
- End geometry
- Male and female connection depth
- Twist-lock or locking-tab profile
- Gasket location
- Outer diameter
- Adapter design
- Required sealing procedure
- Permitted component combinations
- Support and penetration interfaces
Northline Express explicitly warns that chimney components from different manufacturers or brands should not be mixed because they may not fit and could cause serious problems, despite apparently similar dimensions.
The safest purchasing approach is to remain within one approved vent product line unless the appliance and vent manufacturers expressly authorize the proposed combination.
An appliance adapter may still be required when the stove outlet and vent have the same nominal diameter. A product advertised as fitting “most” pellet stoves does not establish fit for a particular model.
Keep these adapter types separate:
- Appliance adapter: Stove outlet to pellet vent
- 3-to-4-inch increaser: Approved diameter transition
- Chimney adapter: Pellet vent to a chimney-system interface
- Liner adapter: Appliance or vent component to a chimney liner
They are not interchangeable merely because they look similar.
Before ordering, complete this compatibility checkpoint:
- Exact stove model
- Appliance-approved vent type
- Vent manufacturer and product line
- Product designation shown on the label and instructions
- Required inside diameter
- Connection and locking profile
- Factory-gasket arrangement
- Approved sealant and required application locations
- Appliance-adapter fit
- Approval and placement of any increaser
- Approved route
- Matching horizontal or vertical termination
- Matching supports and penetration components
For replacement work, identify the installed system from labels, stamped markings, invoices, or original documentation. Do not select a replacement section solely by diameter, color, or appearance.
What to verify when a seller says a product is “listed”
Do not rely on a collection-page standards claim alone. Before purchase, look for:
- A certification or listing mark on the exact product or its documentation
- The product-line or model designation
- Installation instructions covering that exact product family
- The approved appliance or venting uses
- The permitted component combinations
- The applicable country or regional designation
- Instructions for clearances, assembly, supports, penetrations, and termination
If the label, manual, and seller description do not clearly refer to the same product, resolve the discrepancy with the manufacturer before ordering.
Joints, Penetrations, Supports, and Termination: What Must Be Verified
Because pellet exhaust is described as mechanically pressurized, joints must be assembled using the selected vent system’s specified method. Some systems use factory gaskets and locking connections. Other systems or connection types may require manufacturer-approved high-temperature sealant. Appliance adapters, liner connections, increasers, and terminations may have different requirements from ordinary pipe-to-pipe joints.
Do not apply silicone indiscriminately. Rockford Chimney describes its Rock-Vent system as using gasketed pipe-to-pipe connections that do not require sealant at those particular joints, illustrating why the exact product instructions must determine the sealing method for each connection. That description does not establish the requirements for other systems or for every adapter in the same installation.
A wall thimble or listed pass-through is intended to protect and organize the vent’s passage through a wall, but the component alone does not establish that the opening, clearances, route, or termination comply with every applicable requirement. Retail installation guidance specifically identifies the wall thimble as protection where exhaust pipe passes through wall materials during a through-wall installation.
Before cutting any opening, check for:
- Framing and structural members
- Electrical wiring
- Plumbing
- Insulation and other concealed materials
- Interior and exterior finishes
- Actual wall thickness
- Exterior siding and trim
- Eaves and rooflines
- Windows, doors, vents, and air intakes
- Decks, walkways, grade, vegetation, and equipment
- Space needed to assemble, lock, support, inspect, and clean the vent
Commercial installation guidance also calls for checking studs, wiring, and plumbing before cutting. Where concealed conditions cannot be established safely, involve an appropriate building professional.
Ceiling, floor, attic, and roof passages are separate conditions and may require different support or protective parts. The route must remain aligned and supported according to the selected system’s instructions. No single support interval should be assumed to apply to every product and route.
Termination location deserves a separate review. Check it against:
- The appliance installation manual
- The vent-system instructions and label
- Applicable permit and inspection requirements
- The local authority’s interpretation
- Actual site conditions
Retail sources publish varying clearance, roof-height, and support figures, but those figures are not established here as universal requirements.
Treat the governing information as concurrent requirements, not as a hierarchy in which one source automatically cancels another:
- Identify what the appliance installation manual permits.
- Confirm that the vent-system instructions and product label permit the same use.
- Check applicable local code, permit, and inspection requirements.
- Resolve conflicts or ambiguity with the manufacturers and local building or fire authority before purchase or installation.
How to Compare Kits and Individual Components Before Buying
Retailers sell both kits and individual parts in 3-inch and 4-inch categories. A kit can save ordering time when it closely matches the route, but it should be treated as a route-specific bundle—not proof that the installation is complete.
A ground-floor side-wall kit may contain a stove connector, several pipe lengths, a slip section, an elbow or tee, wall pass-through, supports, and a cap. A basement kit may add more vertical pipe, direction changes, another tee, or an increaser. Vortex’s published kit contents illustrate this distinction: its displayed ground-floor and basement bundles use different quantities and combinations of pipe, tees, elbows, supports, pass-throughs, adapters, and caps for their intended routes.
A kit can still omit:
- The correct appliance adapter
- A required diameter increaser
- Additional pipe or an adjustable section
- A penetration part suitable for the actual wall or roof
- Enough supports
- Correct roof flashing
- The route-appropriate termination
- Approved sealant for connections that require it
- Practical cleaning access
- Separate outside-air equipment where required
Wall thickness is an easy detail to miss. Pass-through products can have specified adjustment ranges, so measure the complete wall assembly and verify that the exact component accommodates it.
Use this purchase worksheet before placing an order:
| Field | Project entry |
|---|---|
| Stove manufacturer and exact model | |
| Appliance manual revision/date | |
| Approved vent type | |
| Stove outlet connection | |
| Required vent inside diameter | |
| Approved 3-to-4-inch transition, if any | |
| Elevation guidance checked | |
| Route type | |
| Calculated EVL or sizing-table result | |
| Vent manufacturer and product line | |
| Product label and instructions verified | |
| Appliance adapter part number | |
| Increaser part number and location | |
| Straight lengths and quantities | |
| Adjustable or slip sections | |
| 45-degree elbows | |
| 90-degree elbows | |
| Tees and clean-out caps | |
| Cleaning-access location | |
| Wall thickness | |
| Wall thimble or pass-through | |
| Ceiling or floor passage components | |
| Attic insulation protection | |
| Supports and brackets | |
| Roof flashing and storm collar | |
| Horizontal or vertical termination | |
| Required gasket or sealant procedure | |
| Exterior finish | |
| Outside-air equipment, separately | |
| Permit and inspection requirements | |
| Professional review completed |
Verify seller-reported specifications against the exact product label and installation instructions. That includes inner- and outer-wall materials, gasket design, listing claims, adapter fit, and kit contents. Collection pages are useful for shopping, but they are not controlling installation documents.
Price should not determine the system design. Stock, finishes, availability, and bundle contents change. Compare the completeness and compatibility of the entire route rather than the price of one pipe section.
Plan for Inspection and Cleaning Access
Ash can accumulate in pellet exhaust venting, so inspection and cleaning access should affect the layout before parts are ordered. An awkward route may connect the stove to the outdoors yet make routine service unnecessarily difficult.
A clean-out tee at an appropriate low point can provide access to accumulated ash. In another layout, a removable straight section or a different manufacturer-approved access arrangement may work better. The objective is to avoid repeatedly dismantling concealed or difficult-to-reach parts.
Follow the appliance and vent manufacturers’ inspection and maintenance schedules rather than adopting a universal weekly, monthly, or seasonal interval.
At a high level, commercial maintenance guidance says vent service should begin by shutting the stove down, allowing it to cool, unplugging it, and using suitable protective equipment before opening or brushing the system according to the manufacturers’ procedures. The same guidance describes correctly sized plastic or flexible steel-bristled brushes and cautions that a stiff brush may damage pipe; verify the permitted brush and cleaning method with the selected vent manufacturer.
During maintenance, inspect accessible:
- Joints and locking connections
- Gaskets and prescribed seals
- Appliance and liner adapters
- Supports and brackets
- Clean-out caps
- Straight sections and fittings
- Exterior termination
- Signs of ash leakage
- Corrosion, deformation, looseness, or other deterioration
Do not use one generic buildup thickness as a universal service trigger. Follow the model-specific schedule and respond to abnormal leakage, damage, impaired performance, or other warning signs according to the appliance and vent instructions.
Before purchasing, verify that:
- The exact appliance manual is in hand.
- The vent type and diameter are approved.
- The complete route has been evaluated with the manufacturer’s method.
- One compatible vent product line has been selected.
- Every required adapter and increaser has been identified.
- Each wall, ceiling, floor, attic, and roof passage has the specified components.
- Supports and alignment components are included.
- The termination matches the route and vent system.
- Cleaning and inspection access is practical.
- Permit and inspection requirements have been checked.
- A qualified professional has reviewed unresolved sizing, route, penetration, or compatibility questions.
The best pellet stove exhaust pipe is not simply a 3-inch or 4-inch product. It is the complete compatible system that matches the exact appliance, permitted route, manufacturer instructions, and local requirements.
Frequently Asked Questions
Can I use regular wood-stove pipe for a pellet stove exhaust?
Do not assume that ordinary wood-stove pipe is suitable. Generic single-wall or double-wall wood-stove connector pipe may not be approved for mechanically pressurized pellet exhaust. Use the pellet-rated vent type identified in the appliance manual and accepted by the vent manufacturer; specialty retail guidance makes the same distinction between pellet vent and regular stove pipe for this application.
Outside-air hose is not a substitute. It supplies combustion air; pellet vent carries exhaust outdoors.
Is 3-inch or 4-inch pellet vent better for a long run or several elbows?
A 4-inch vent generally presents less resistance than a 3-inch vent, particularly at bends, so a longer or more complex route may require the larger diameter. The approved size must still come from the exact stove manual’s EVL calculation, sizing table, elevation guidance, and route limits.
Do not apply a generic run-length or elbow threshold. If the manual requires a 3-to-4-inch transition, use the approved increaser at the specified location.
Can pellet vent pipe from different brands be mixed?
Do not assume so. Matching nominal diameters do not guarantee matching locks, gaskets, dimensions, adapters, sealing methods, or approved combinations. Northline Express warns that different manufacturers’ chimney components may not fit and could cause serious problems if mixed.
For an existing installation, identify the installed product line from labels or documentation instead of matching a replacement by appearance.
Does a pellet stove need a chimney, or can it vent through a wall?
A pellet stove does not necessarily require a masonry chimney. Depending on the appliance approval and local requirements, possible routes include a permitted side-wall termination, a wall penetration followed by an exterior vertical rise, an interior run through the roof, or an approved liner through an existing chimney.
A wall route still needs compatible vent, appropriate penetration protection, support, an approved terminal location, and any required permits or inspection. Confirm that the exact stove permits the proposed route, especially if it is horizontal-only.
Do pellet vent joints need high-temperature silicone?
Not all joints do. Some vent systems use factory gaskets and locking connections that the seller describes as requiring no sealant at ordinary pipe-to-pipe joints. Other systems—or adapters, increasers, liner connections, and terminations—may require manufacturer-approved high-temperature sealant.
Follow the instructions for every connection type. Applying silicone everywhere can depart from the selected system’s assembly instructions, while omitting required sealant can leave a pressurized exhaust connection improperly sealed.