
A Practical Cleaning Routine for a Safer, More Reliable Burn
Inspect the burn pot and remove accessible ash. Deeper work reaches hidden passages and venting. Electrical parts or difficult access need qualified service.
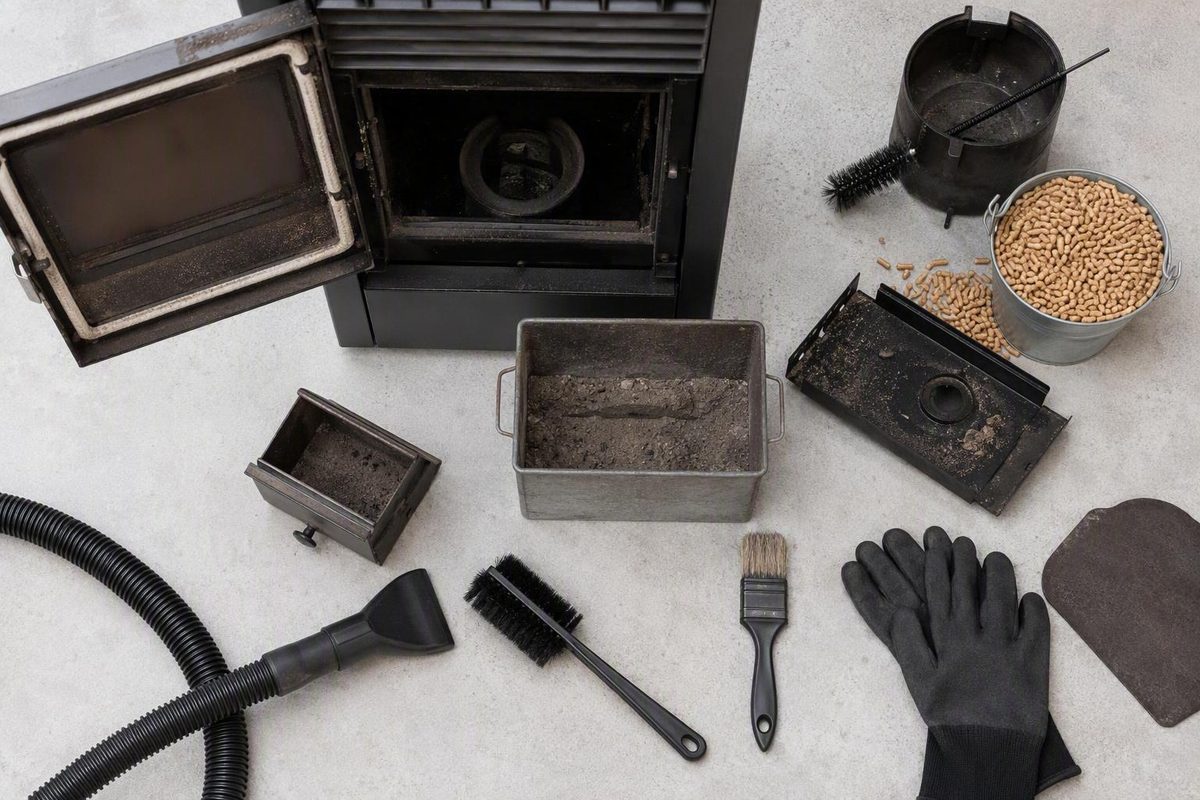
A practical cleaning routine for a safer, more reliable burn
Cleaning a pellet stove is not one task performed on one universal schedule. It is a layered routine: frequent inspection of the burn pot, periodic removal of accessible ash, deeper cleaning of concealed passages and venting, and qualified service when the work reaches electrical parts, difficult access, damaged components, or unresolved operating problems.
The owner’s manual for the exact make and model is the controlling reference. Pellet stoves differ in burn-pot design, heat-exchanger access, cleanout locations, blower arrangement, vent configuration, approved tools, and required component orientation. A procedure that is ordinary on one appliance may damage another or leave it incorrectly assembled.
This guide is therefore model-agnostic. Use it to organize the work, not to replace the stove manual, vent instructions, vacuum instructions, or applicable service requirements.
Start With the Manual, Not a Universal Cleaning Schedule
Before cleaning a pellet stove, locate the manual for the exact model. Use it to identify:
- Required shutdown and cooling procedures
- Approved cleaning tools
- Owner-accessible components
- Burn-pot removal and orientation
- Baffle, firewall, and cleanout locations
- Heat-exchanger cleaning mechanisms
- Vent-cleaning instructions
- Inspection and service intervals
- Tasks reserved for a technician
- Any maintenance records required by the warranty
Cleaning schedules vary because stove design, ash-pan capacity, heating load, pellet consumption, fuel characteristics, and observed residue all affect how quickly maintenance is needed. A stove used continuously as a primary heater may require attention sooner than one operated only on cold evenings.
Published recommendations illustrate the variation. Some general guides suggest basic cleaning about every three or four days, while others use a weekly baseline. Deeper-cleaning recommendations range from approximately every one or two tons of pellets to once per heating season. These are planning references, not universal requirements; Koopman Lumber, a pellet retailer, expressly directs owners to defer to the appliance manual despite offering a general schedule (pellet-stove cleaning intervals).
A flexible starting framework is:
- Inspect frequently during active use. Observe the flame, burn pot, combustion-air holes, ash level, and visible deposits when refilling or checking the stove.
- Clean accessible areas when buildup requires it. Depending on the appliance and use, published guidance commonly places this work somewhere between every few days and weekly.
- Perform deeper cleaning according to the manual. Use its pellet-volume or seasonal interval, but clean sooner if ash, carbon, soot, or operating symptoms appear first.
- Complete seasonal work. Clean and inspect the full owner-accessible system at the end of the heating season or at the time specified by the manufacturer.
Infrequent use does not eliminate the need to inspect the vent, seals, and concealed chambers before the next heating season.
A simple maintenance log can help replace guesswork with a stove-specific pattern:
| Date | Pellets used since last cleaning | Areas cleaned | Deposits found | Operating symptoms |
|---|---|---|---|---|
| Jan. 10 | Approximate bag count | Burn pot, firebox, glass | Light, loose ash | None |
| Jan. 17 | Approximate bag count | Burn pot, ash pan, exchanger | Hard deposit in pot | Flame becoming lazy |
| End of season | Approximate seasonal total | Full manual-authorized cleaning | Ash behind cleanout plate | None after reassembly |
Exact weights are not essential. Bag counts or hopper fills may be enough to reveal a pattern. If hard deposits or blocked holes repeatedly appear after a similar amount of fuel, schedule the next accessible cleaning before that point while remaining within the manual’s limits.
Safety Setup and the Right Cleaning Tools
General guidance cannot replace the safety instructions for the appliance and cleaning equipment.
Essential safety sequence
- Let the stove complete its normal shutdown cycle.
- Confirm that combustion and automatic feeding have stopped.
- Allow the appliance, internal parts, ash, and remaining residue to cool fully.
- Switch the appliance off as directed.
- Disconnect electrical power.
- If there is any uncertainty that the stove or ash is fully cool, do not scrape, vacuum, remove parts, or dispose of the ash.
Forge & Flame’s maintenance guidance likewise directs owners to cool, power off, and unplug the stove before annual internal maintenance (shutdown and maintenance guidance).
Do not use a fixed waiting period as proof that the stove is safe to clean. The supplied guidance does not establish one interval that guarantees every appliance, deposit, and retained ember will be cool. Follow the model manual and the instructions for the cleaning equipment.
A conservative toolkit includes:
- A vacuum designed or expressly rated for fine, completely cold ash
- The manufacturer-supplied or approved burn-pot scraper
- Small, soft-bristled brushes
- Manual-approved tools for opening combustion-air holes
- A soft cloth and manufacturer-approved, nonabrasive glass cleaner
- A lidded metal container for completely cooled ash
- Model- and vent-approved brushes, if owner cleaning of the vent is authorized
- A flashlight for inspecting cleanouts and component seating
- Floor protection kept away from hot surfaces
- The owner’s manual or a saved digital copy
An ash-suitable vacuum should not be confused with an ordinary household vacuum. Commercial cleaning guidance recommends purpose-built ash equipment because fine ash may escape unsuitable filtration; any vacuum must be used according to its own instructions and only for completely cold material (ash-vacuum guidance).
Transfer only completely cooled ash to a closed metal container. Keep it away from combustible materials whenever there is uncertainty about the contents, and check applicable local disposal requirements. Manufacturer and retailer guidance both describe closed metal storage for removed ash rather than combustible containers.
Avoid turning improvised techniques into universal rules:
- Do not use abrasive products, oven cleaner, or an unapproved chemical on the glass.
- Do not substitute a drill bit, screwdriver, wire, or another metal tool for the specified burn-pot tool unless the manual approves it.
- Do not enlarge or reshape combustion-air holes.
- Do not drag a scraper or vacuum nozzle across gaskets.
- Do not use compressed air on sensors, pressure tubing, motors, or concealed passages unless the model instructions call for it.
- Do not lubricate augers, motors, bearings, or blowers according to generic advice.
- Do not disconnect wiring, pressure tubes, or sensors during ordinary cleaning.
- Do not force a panel, baffle, cleanout cover, or vent component that resists removal.
The objective is controlled residue removal through known access points—not aggressive disassembly.
The Routine Cleaning Sequence: Burn Pot, Ash, Firebox, Heat Exchanger, and Glass
A routine heating-season cleaning covers the parts accessible without major disassembly. Begin only after completing the shutdown, cooling, and power-disconnection sequence above.
1. Inspect before removing anything
Examine the burn pot, visible firebox, ash pan, baffles, and door area before vacuuming. Note hard carbon in the pot, blocked holes, ash piled against a component, unusual soot, or a shifted seal. These observations may help explain a recent change in operation.
If the arrangement is unfamiliar, take a reference photograph before removing an owner-serviceable part. The photograph can help document the original position, but the manual still controls reassembly.
2. Remove or access the burn pot as directed
Some burn pots lift out; others remain in place for routine scraping. Follow the model instructions and do not apply force.
Use the supplied or approved scraper to loosen carbon and other deposits. Work carefully around edges, corners, the ignition area, and surfaces where hard material has accumulated. The goal is to restore the pot’s intended shape and openings without gouging it.
Clear obstructed combustion-air holes only with a tool approved for the model. Do not enlarge, drill, reshape, or change the angle of a hole. Correct burn-pot cleaning and orientation vary by appliance.
3. Vacuum completely cold loose ash
Use the ash-rated vacuum only as its instructions permit. Owner-accessible areas may include:
- The burn-pot cradle or surrounding recess
- Accessible firebox surfaces
- Corners and ledges
- Areas beneath or beside the burn pot
- Approved ash-collection chambers
- Residue loosened during scraping
Move gently near insulation, firebox panels, wiring routes, sensors, and seals. Do not insert the hose into an unseen passage merely because it fits.
4. Empty and reseat the ash pan
Remove the ash pan according to the manual, keeping it level where practical. Transfer only completely cold ash to the lidded metal container. Vacuum the empty pan area only if it is designated for owner access.
Reinstall the pan fully.
5. Clean the heat exchanger as authorized
Some stoves have rods, levers, scrapers, or another built-in mechanism for dislodging residue from heat-exchange surfaces. Operate that mechanism only as the manual directs.
Other models require removal of a baffle before accessible exchanger surfaces can be brushed or vacuumed. That is a model-dependent procedure, not a universal routine step. If a mechanism binds or a baffle does not release normally, stop rather than forcing it.
6. Clean the glass when fully cool
Use a manufacturer-approved, nonabrasive method only after the glass is fully cool. Avoid abrasive products and oven cleaner; general service guidance also directs owners back to the manufacturer’s approved glass-cleaning method (glass-cleaning precautions).
Record glass that blackens unusually quickly. Rapid soot return may accompany burn-pot deposits, restricted airflow, fuel differences, a sealing problem, or another operating fault; it is not necessarily a glass-cleaning issue.
7. Inspect visible gaskets without disturbing them
Look at the door, ash pan, glass, hopper lid, and accessible cleanout seals as applicable. Do not scrape them or pull a vacuum nozzle along their edges.
If a gasket appears loose, frayed, torn, crushed, or displaced, consult the model instructions or a qualified service provider before proceeding with any repair. Gasket materials and replacement procedures are not universal.
8. Verify the burn pot and interior before closing
Confirm that:
- Loose accessible ash has been removed.
- Burn-pot air holes are open and undamaged.
- The pot is fully seated.
- Its orientation matches the manual.
- The ignition opening or other indexed feature is correctly aligned.
- No deposit is holding the pot above its intended seat.
- No tools, cloths, or loose parts remain inside.
Do not infer orientation from another stove or an online image.
Routine-cleaning checklist
- [ ] Normal shutdown completed
- [ ] Stove, parts, and ash fully cool
- [ ] Electrical power disconnected
- [ ] Interior inspected before cleaning
- [ ] Burn pot scraped with an approved tool
- [ ] Combustion-air holes open and undamaged
- [ ] Completely cold loose ash vacuumed
- [ ] Ash pan emptied and fully reseated
- [ ] Heat-exchanger mechanism used only as directed
- [ ] Fully cooled glass cleaned nonabrasively
- [ ] Visible gaskets inspected without disturbance
- [ ] Burn pot correctly seated and oriented
- [ ] Tools and loose material removed
- [ ] Door and access points properly closed
- [ ] Cleaning date and observations recorded
Deep Cleaning: Follow the Ash Path Beyond the Visible Firebox
A clean-looking firebox does not prove that concealed ash channels or the exhaust route are clear. Routine vacuuming handles visible material; deeper cleaning follows the combustion and exhaust path through the owner-accessible parts of the stove.
A conceptual path is:
- Burn pot and combustion-air openings
- Firebox and nearby ash-collection areas
- Heat-exchange passages
- Baffles, firewalls, or internal plates
- Concealed ash traps and cleanout chambers
- Accessible blower and fan areas
- Hopper and accessible feed area
- Exhaust housing and stove outlet
- Vent elbows and horizontal sections
- T-joint collection points and cleanout caps
- Remaining accessible vent route
- Outdoor termination or cap
This map helps identify the relevant manual sections. It is not permission to remove every listed component.
Concealed chambers and removable barriers
Ash may settle behind baffles, firewalls, cleanout plates, and removable panels even when the main chamber appears clean. ComfortBilt’s manufacturer guidance notes that concealed channels behind plates can retain ash and that access differs by model (concealed ash-channel guidance).
Remove only parts identified as owner-serviceable in the exact manual. Document the position and orientation of each piece, and avoid disturbing associated gaskets.
Where access is authorized, loosen residue gently with a small brush and collect it with the ash vacuum. Do not push tools into unseen tubes or passages that may contain pressure tubing, probes, or other sensing components.
Blowers and fan areas
Accessible blower wheels and fan blades can collect fine residue. If the manual authorizes owner access, use a soft brush and controlled vacuuming.
Motor removal, internal bearing work, lubrication, electrical testing, and wiring disconnection are not generic cleaning steps. Treat them as model-dependent service work.
Hopper and feed area
Pellet fragments and dust can collect at the bottom of the hopper and around accessible feed openings. Follow the manual for emptying the hopper, then vacuum only designated owner-accessible areas.
Do not remove the auger, gearbox, motor, guard, or feed plate unless the manufacturer provides an owner procedure. Do not apply generic lubricant to a feed system.
Exhaust housing and vent route
A deeper cleaning should account for the complete accessible exhaust route, not only the short pipe visible behind the stove. Likely collection points include:
- Exhaust housings
- Horizontal vent sections
- Elbows and direction changes
- T-cleanouts
- Low collection points
- Termination caps or screens
Use only a brush size, type, and access method approved for the vent system. Do not push a brush blindly toward an exhaust-sensing probe or inaccessible stove component. Restore every disturbed cleanout cap and vent connection as its instructions require.
Use qualified service instead of improvising when the manual does not authorize owner access, a pellet insert must be removed, the termination cannot be reached safely, the vent route cannot be completely inspected, a seal would have to be disturbed without clear replacement instructions, or reassembly is uncertain.
The goal is comprehensive airflow-path cleaning within the permitted scope—not applying one manufacturer’s teardown procedure to every stove.
Build a Cleaning Schedule Around Use, Pellet Volume, and Ash
Use a tiered schedule as a planning tool, then compare it with the appliance manual. Published specialist guidance places basic cleaning between frequent checks and weekly work, with deeper cleaning often tied to approximately one or two tons of pellets or a heating season (routine and deep-cleaning intervals).
| Planning tier | Observations and tasks |
|---|---|
| Frequent checks during use | Observe the flame and burn pot; look for blocked holes, hard deposits, unburned fuel, and rising ash; check ash-pan capacity. |
| Routine cleaning as buildup requires | Scrape the burn pot; clear approved air openings; empty the ash pan; vacuum the accessible firebox; use the exchanger-cleaning mechanism where fitted; clean fully cooled glass. |
| Periodic or pellet-volume-based work | Clean manual-authorized baffles and hidden ash traps; inspect accessible blower areas; remove hopper dust; inspect visible gaskets; examine more of the accessible exhaust route. |
| Annual or end-of-season work | Address the complete owner-accessible stove and vent route, concealed chambers, blowers, feed area, seals, and accessible mechanical components; arrange service for work beyond owner scope. |
Shorten the interval when you observe:
- Heavy daily use
- Faster ash-pan filling
- Carbon deposits returning sooner
- Repeatedly obstructed burn-pot holes
- More soot than usual
- Rapid glass blackening
- A weaker or lazier flame
- Declining heat output
- Slower or unreliable ignition
- Recurring shutdowns
- Changes in fan or auger sound
Different fuels may produce different amounts or types of residue. Treat a fuel change as a reason to observe the stove and adjust the cleaning interval—not as proof that a particular pellet grade will prevent maintenance or protect components.
Compare your log with the manufacturer’s maximum interval. Clean sooner when buildup or symptoms show that the nominal schedule is too long.
End-of-Season Cleaning, Reassembly, and the Preseason Test
Spring or summer is a practical time for comprehensive cleaning because it allows the season’s ash, pellet dust, and old fuel to be removed before the appliance sits unused. It also leaves time to resolve damaged parts or uncertain reassembly before heating is needed again.
Several manufacturer and retailer guides advise removing unused pellets after the heating season to reduce moisture-related corrosion or feeding trouble. The stove manual must determine whether removal is recommended and how to empty the hopper and feed system. Do not reach into or dismantle the auger merely to retrieve the last pellets.
An off-season checklist should include:
- Emptying old fuel when the manual recommends it
- Removing accessible pellet dust and fragments
- Cleaning the burn pot and firebox
- Opening manual-authorized concealed ash chambers
- Cleaning approved heat-exchange passages
- Inspecting accessible blower areas
- Inspecting visible gaskets and seals
- Cleaning the exhaust housing and complete accessible vent route
- Checking elbows, T-cleanouts, collection points, and the termination
- Recording damaged, loose, or questionable components
- Scheduling service for inaccessible or unresolved items
Conduct a reassembly audit
Check every disturbed component against the manual:
- Burn pot: Fully seated and correctly oriented
- Baffles and firewalls: Returned to their specified slots, ledges, or retainers
- Cleanout plates: Installed in the correct direction and sealed as required
- Access covers: Secured without trapped debris
- Gaskets: In place and not visibly damaged or pinched
- Panels: Correctly aligned with all required fasteners
- Ash pan: Fully inserted
- T-cleanout caps: Reinstalled and secured
- Vent connections: Restored wherever cleaning disturbed them
- Electrical connections: Left untouched unless handled under an authorized service procedure
- Tools and loose parts: Removed from the stove and vent area
Do not force a component that will not reseat. Missing fasteners, unresolved fit, and disturbed seals require model-specific instructions or qualified service.
Perform a separate preseason inspection and test
Before sustained use, inspect it again for debris, corrosion, displaced parts, vent obstruction, damaged seals, and foreign material in the hopper or termination.
Then run an operating cycle according to the manual and observe:
- Startup and control response
- Ignition
- Pellet feeding
- Flame development and stability
- Airflow and fan operation
- Heat output
- Smoke or odor leakage
- Auger, blower, and motor sounds
- Normal shutdown
ComfortBilt recommends checking startup, normal operation, and shutdown after reassembly rather than relying on visual inspection alone (post-cleaning operating test).
If the test fails, repeat only accessible checks such as burn-pot seating, open air holes, ash-pan position, cleanout-cover installation, available fuel, and obvious hopper debris. Do not turn a cleaning problem into improvised work on wiring, controls, sensors, igniters, or motors.
What the Flame, Soot, Heat, and Noise May Be Telling You
Operating symptoms can identify where to inspect, but they do not prove that dirt is the sole cause. Cleaning is a screening step, not a complete diagnosis.
| Symptom | Accessible cleaning checks | Other possible issue or next step |
|---|---|---|
| Lazy, weak, unusually yellow, or sooty flame | Check the burn pot, combustion-air holes, concealed ash passages, and accessible exhaust route. | Draft, seals, blower operation, settings, fuel, or installation may require diagnosis. |
| Poor ignition or no-start | Check for blocked burn-pot holes, excess ash, incorrect pot seating, and accessible residue near the ignition area. | The igniter, sensor, control, wiring, or feed system may be involved. |
| Reduced heat | Inspect heat-exchange surfaces, airflow passages, accessible blower areas, and venting. | A blower, control, sensor, feed, or installation problem may remain after cleaning. |
| Inconsistent feeding or grinding | Remove accessible hopper dust and look for an obvious obstruction without entering the auger path. | Persistent trouble may involve the auger, gearbox, motor, alignment, or a foreign object. |
| Excessive smoke, smoke backup, or persistent odor | A restricted exhaust route is one possibility. | Stop operating the appliance if smoke enters the room and arrange prompt investigation. |
| Rattling, vibration, or loud fan operation | Look for accessible loose debris or residue in owner-serviceable fan areas. | Blades, bearings, motors, fasteners, or other mechanical parts may require diagnosis. |
| Rapid glass blackening | Check burn-pot deposits, open air holes, concealed ash, and accessible vent restriction. | Fuel, air settings, seals, draft, or component faults may contribute. |
| Recurring shutdowns | Confirm accessible cleanliness, burn-pot seating, airflow openings, and fuel supply. | Controls, switches, sensors, feed parts, combustion components, or installation faults may be responsible. |
A heating-service guide identifies exhaust blockage as one possible cause of smoke backup and advises professional help for persistent or severe ventilation trouble (pellet-stove operating and ventilation problems).
Stop using the appliance and seek appropriate assistance for smoke entering the room, a carbon-monoxide alarm, damaged or exposed wiring, unresolved vent blockage, a component that cannot be reinstalled correctly, or persistent ignition, feeding, odor, shutdown, or abnormal-noise problems. Commercial hearth guidance specifically warns that blocked venting can allow smoke and carbon monoxide into the home (blocked-vent safety guidance).
DIY Cleaning Versus Qualified Service
A practical boundary divides the work into three tiers.
Tier 1: Routine owner-safe cleaning
When the manual permits it, an owner can commonly handle:
- Burn-pot scraping
- Clearing combustion holes with an approved tool
- Removing completely cold ash
- Emptying and reseating the ash pan
- Vacuuming accessible firebox surfaces
- Operating an approved heat-exchanger cleaning mechanism
- Cleaning fully cooled glass
- Inspecting visible gaskets
- Removing accessible hopper dust
- Recording fuel use, deposits, and symptoms
These tasks use known access points and do not require electrical diagnosis, motor removal, or uncertain disassembly.
Tier 2: Model-dependent advanced cleaning
Proceed only when the manual provides clear instructions, the required tools are available, and correct reassembly can be verified. Tasks may include:
- Removing baffles or firewalls
- Opening concealed ash traps
- Removing cleanout plates
- Opening side or rear panels
- Accessing blower areas
- Reaching approved feed-system cleanouts
- Separating designated vent sections
- Brushing elbows and T-cleanouts
- Inspecting the outdoor termination
Stop if the manual does not identify the part, a seal is unexpectedly disturbed, required fasteners are missing, access is unsafe, or a component will not return to its specified position.
Tier 3: Technician-level inspection or repair
Qualified service is appropriate for:
- Electrical testing
- Sensor or pressure-switch work
- Wiring repair
- Control diagnosis
- Igniter diagnosis beyond an owner procedure
- Motor or blower disassembly
- Auger, gearbox, or feed-system repair
- Difficult full-vent cleaning
- Insert removal
- Inaccessible termination access
- Damaged seals or components
- Persistent ignition, feeding, smoke, odor, or combustion problems
- Recurring unexplained shutdowns
- A carbon-monoxide alarm
Commercial stove and service sources commonly recommend annual professional service. Mountain Man Fireplace & Chimney, for example, describes appointments covering venting, combustion areas, feed components, ignition parts, controls, and a final check (professional pellet-stove service scope). Because the company sells maintenance services, treat this as a common commercial recommendation rather than proof that paid annual service is mandatory for every appliance.
Check the actual owner’s manual and warranty. The appropriate service interval depends on the model, fuel volume, installation, access, owner capability, and documented requirements. Professional service should not be assumed to guarantee a specific efficiency gain, cost saving, component lifespan, or warranty outcome.
Practical stop-work triggers include:
- Uncertain disassembly or component orientation
- A part that will not reseat correctly
- A damaged seal or wire
- Venting that cannot be completely reached or restored
- An insert that must be removed
- Unsafe termination access
- Persistent ignition or feeding trouble after accessible cleaning
- Smoke entering the room
- Persistent unusual odors
- Continuing abnormal motor, fan, or auger noise
- A carbon-monoxide alarm
Frequently Asked Questions
How often should a pellet stove be cleaned during the heating season?
Inspect the burn pot, flame, air holes, and ash level frequently. Published general guidance places accessible routine cleaning somewhere between every few days and weekly, but the exact interval must come from the model manual and the stove’s condition.
Use pellet consumption, ash accumulation, carbon deposits, blocked holes, and operating symptoms to refine the interval. A stove used continuously as a primary heater may need attention sooner than one used occasionally.
Can I use a regular household or shop vacuum to clean pellet ash?
Do not assume that an ordinary household or general-purpose shop vacuum is suitable. Use equipment specifically intended or expressly rated for fine, completely cold ash, and follow the vacuum manufacturer’s instructions.
If there is any uncertainty that the ash is fully cool, do not vacuum it. A large canister alone does not establish that a shop vacuum has appropriate filtration or is intended for ash collection.
Should I remove pellets from the hopper at the end of the season?
Several cleaning guides recommend removing unused pellets and accumulated pellet dust during off-season maintenance. Whether and how to do so must come from the stove manual.
If removal is recommended, empty only the owner-accessible areas by the approved method. Do not reach into the auger path, run an improvised emptying cycle, or dismantle the feed system to retrieve the final pellets.
Why does my pellet-stove glass turn black so quickly?
Rapid blackening may accompany a dirty burn pot, obstructed combustion-air holes, concealed ash buildup, restricted exhaust, fuel differences, or another combustion problem. Clean the accessible airflow and combustion areas as directed, then verify correct burn-pot seating.
If the soot quickly returns, cleaning may not be the complete answer. Draft, settings, gaskets, blowers, sensors, fuel, or installation conditions may require further diagnosis. Clean the glass only when it is fully cool and with a manufacturer-approved, nonabrasive method.
Do I need professional pellet-stove cleaning every year?
Annual professional service is commonly recommended by commercial stove and service providers, particularly for concealed chambers, blowers, complex venting, inserts, feed components, sensors, and a complete operating inspection. It is not safe to assume that paid annual service is universally mandatory.
Check the exact manual and warranty. Arrange qualified service whenever prescribed work exceeds your access or ability, and sooner when there is smoke leakage, a carbon-monoxide alarm, damaged wiring or seals, inaccessible venting, persistent odors, recurring shutdowns, or unresolved ignition, feeding, motor, or combustion problems.
The repeatable ownership habit is straightforward: let the manual define the procedure, clean accessible combustion areas before deposits obstruct them, use pellet consumption and observed ash to refine the schedule, include concealed passages and venting in deeper service, audit every disturbed component during reassembly, and stop when the work reaches inaccessible venting, damaged parts, electrical systems, smoke leakage, or persistent operating faults.