
How to Plan a Pellet-Stove Installation Without Missing a Safety-Critical Step
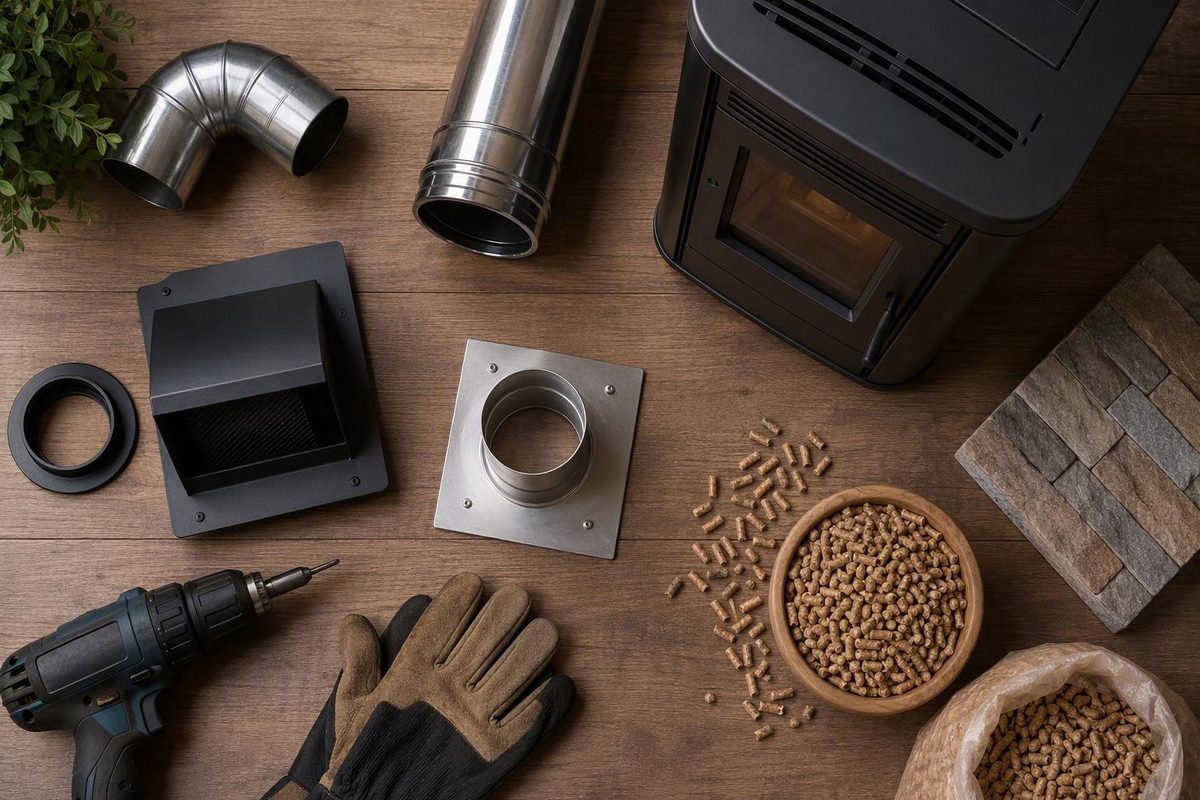
A pellet stove may be able to vent through an exterior wall instead of a conventional masonry chimney. That flexibility can make installation look simple, but the project still combines a solid-fuel appliance, hot exhaust, combustible construction, electrical power, and local approval requirements.
The safe way to install a pellet stove is to treat it as a coordinated system. Start with the exact appliance manual, the listed vent manufacturer’s instructions, and the requirements of the local authority having jurisdiction. Then plan the stove location, hearth, clearances, exhaust route, outside combustion air, power supply, maintenance access, permits, inspection, and startup as one project.
This guide explains that planning process for freestanding pellet stoves and fireplace inserts. It is not a substitute for model-specific instructions, permit requirements, or qualified trade guidance.
Start With the Stove Manual, Not a Generic Installation Diagram
Before buying pipe or cutting an opening, confirm three controlling sources:
- The selected stove’s installation manual and listing
- The instructions and listing for the approved vent system
- The permit, code, and inspection requirements of the local authority having jurisdiction
Generic diagrams can show the sequence of a project, but they cannot establish universal clearances, hearth dimensions, vent diameters, route limits, joint-sealing methods, or terminal locations. Those details vary by appliance, vent system, building, and jurisdiction. A general installation guide from Fyre Direct similarly emphasizes that the appliance manual, approved vent configuration, local requirements, clearances, floor protection, electrical supply, and service access must be considered together before installation.
Do not start from a generic “pellet-stove installation kit.” Start from an approved configuration in the appliance manual, then identify every component needed to build that configuration.
Complete a manual-first worksheet
Create a worksheet for the specific model you are considering. If a required field cannot be answered from the documentation, ask the manufacturer, dealer, installer, vent-system supplier, or local inspector before proceeding.
| Item | What to record |
|---|---|
| Manufacturer and model | Exact name, model number, serial-number range if relevant, and manual revision |
| Appliance listing | Listing or certification marks and approved installation categories |
| Installation type | Freestanding stove, insert, alcove, mobile/manufactured home, or another approved use |
| Combustible clearances | Rear, side, corner, front, mantel, ceiling, vent, and applicable alcove clearances |
| Floor protection | Required dimensions, front and side extensions, thickness, materials, construction, and thermal rating |
| Vent size | Approved diameter or permitted diameter options |
| Vent-system type | Required listing and permitted materials |
| Approved routes | Direct sidewall, exterior vertical, interior vertical, existing chimney, or insert liner |
| Route limits | Maximum horizontal run, total equivalent length, elbow limits, and any required rise |
| Joint assembly | Fastening, locking, overlap, and sealing instructions |
| Support requirements | Brackets, straps, cleanouts, firestops, and support intervals |
| Termination rules | Required separation from openings, grade, air intakes, eaves, corners, utilities, and other features |
| Outside air | Whether required, approved kit, route, clearances, and termination rules |
| Electrical supply | Voltage, grounding, circuit, receptacle location, polarity, and model-specific requirements |
| Mobile-home approval | Whether the exact model is approved and what additional provisions apply |
| Service access | Space needed to load pellets, remove ash, open doors, remove panels, and replace components |
| Startup requirements | Commissioning, test-fire, draft, control, or inspection procedures |
| Warranty conditions | Installer, component, documentation, registration, and maintenance requirements |
Contact the local authority before ordering components to learn what approvals and inspections may apply. Also contact your insurer before altering the building or installing the appliance; ask whether it requires advance notice, a particular installer qualification, an inspection record, or other documentation. Read the actual warranty rather than assuming either DIY or professional installation will preserve coverage.
Identify the configuration you are planning
Most projects fall into one of four broad categories:
- Freestanding stove with approved sidewall venting: The exhaust passes through an exterior wall and terminates as the model and vent system permit.
- Freestanding stove with vertical venting: The vent travels through the ceiling and roof, or passes through a wall before continuing vertically outside.
- Freestanding stove connected through a suitable existing chimney: The chimney is inspected, and an approved liner or other specified system is installed when required.
- Fireplace insert with a liner: The insert connects through an adapter to a compatible listed liner terminating at the top of the chimney.
These are planning categories, not interchangeable designs. Only use components approved for the appliance and compatible with one another. A part that fits physically is not necessarily listed for the application. Do not mix vent brands, adapters, liners, or fittings unless their listings and instructions expressly permit the combination.
Assess Heat Demand, Placement, and Service Access
The best-looking location may not be the best heating location, and the best heating location may not permit a compliant vent route. Placement requires balancing comfort with the appliance’s installation constraints.
Begin with the intended role of the stove:
- Heating one frequently occupied room
- Providing heat to an open-plan zone
- Supplementing a central system
- Carrying a substantial part of the home’s heating load
- Providing shoulder-season heat rather than peak-winter heat
Then evaluate the building rather than relying only on floor area. Important variables include local climate, insulation, air leakage, room layout, ceiling height, window area and condition, open stairways, closed doors, and how air moves between rooms.
A BTU-per-square-foot shortcut can help screen products, but it is not a dependable load calculation. An undersized appliance may fail to maintain the intended temperature during cold weather. An oversized one may overheat the main room or be poorly matched to how the zone is used. If the stove is expected to carry a substantial share of the home’s heating load, obtain a property-specific heat-loss assessment.
Test each candidate location against the full installation
For every possible location, ask:
- Can all listed stove and vent clearances be maintained?
- Is there enough space for the required floor protector?
- Is an approved exhaust route feasible?
- Can the terminal be placed in a permitted exterior location?
- Can outside combustion air be added if required?
- Is suitable grounded power available in an approved location?
- Can pellets be loaded without moving furniture?
- Can the burn area, ash collection points, and vent cleanouts be reached?
- Can rear or side service panels be removed?
- Could a technician replace an auger motor, fan, sensor, or control without dismantling the room?
- Will normal cleaning soil walls, flooring, or furnishings unnecessarily?
- Does the location distribute heat to the intended area rather than merely creating one very hot room?
Most conventional pellet stoves use electricity for powered fuel delivery, fans, controls, and ignition, although the exact electrical requirements are model-specific. The proposed receptacle therefore needs to be part of the site plan, not an afterthought. General installation guidance also calls for a grounded electrical supply and checking the route for wiring, plumbing, and framing before cutting into a wall.
Verify the hearth instead of assuming it qualifies
Tile, stone, brick, concrete, and an existing fireplace hearth may look noncombustible while still failing the appliance’s requirements. The manual may specify more than a noncombustible surface: it may require particular dimensions, extensions, thickness, construction, or thermal resistance.
Record the entire floor-protection specification and compare it with the actual assembly beneath the visible finish. Tile over a combustible subfloor, for example, should not be accepted merely because the top surface does not burn.
The same caution applies to walls. A decorative stone, tile, or metal panel does not automatically reduce a listed clearance to combustible construction behind it. Use the appliance’s unmodified clearance unless the manual and local authority recognize a specific tested or approved reduction method.
Design for ownership, not just installation day
A stove squeezed tightly into a technically possible location can become difficult to maintain. Pellet appliances accumulate ash in the burn area and exhaust path, and their mechanical components eventually need inspection or replacement.
Preserve direct access to:
- The hopper and pellet-loading area
- The burn pot and combustion chamber
- Ash pans and internal ash traps
- Vent cleanouts and tees
- Motors, fans, switches, and controls
- Removable side or rear panels
- The vent-to-stove connection
- Any liner adapter or insert connection that requires service
Before committing, consider whether the appliance’s electricity dependence, cleaning routine, fuel handling, and mechanical maintenance fit your household. A broader review of pellet-stove ownership tradeoffs can help frame those practical questions.
A compact route that hides every cleanout behind the stove or leaves no room to remove a panel is not a good installation plan.
Complete a Site Survey Before Choosing the Vent Route
A route is not viable merely because the pipe can be drawn on a photograph. Inspect the entire path inside and outside before selecting the configuration.
Interior survey
Map the stove footprint, hearth, vent path, and maintenance envelope. Inspect or determine the location of:
- Combustible wall, floor, and ceiling assemblies
- Studs, joists, rafters, trusses, and other framing
- Electrical wiring and service equipment
- Plumbing, drains, vents, and hydronic lines
- Gas or fuel lines
- Nearby receptacles and their condition
- Built-in cabinets, mantels, trim, curtains, and furniture
- Ceiling transitions, soffits, chases, and attic obstructions
- Roof structure along a proposed vertical path
- Access needed to install supports, firestops, or pass-through components
- Space needed for cleaning and future repairs
A visual scan of one wall surface is not enough. The route must be evaluated through every concealed assembly it will cross.
Exterior survey
Continue the same route outside. Record:
- Doors and operable or fixed windows
- Mechanical and combustion-air intakes
- Dryer and other exhaust outlets
- Electrical meters, service conductors, and utility equipment
- Gas equipment and fuel-storage locations
- Grade, decks, walkways, stairs, and gathering areas
- Eaves, soffits, roof overhangs, and gutters
- Inside and outside building corners
- Vegetation and combustible storage
- Prevailing wind exposure
- Roof valleys and areas prone to runoff or ice
- Normal and drifting snow depth
- Locations where ash residue could stain siding
- Access for inspecting and cleaning the terminal
Copy the required terminal separations from the appliance and vent instructions, then check them against local requirements. Do not borrow a termination distance from another model or from a diagram that happens to resemble your house.
Treat outside combustion air as a separate system
The exhaust vent carries combustion products out. The outside-air intake supplies combustion air in. They are separate systems with different components, routes, and termination rules.
Outside air may be required by the appliance listing, local requirements, the type of home, the installation location, or pressure conditions. It deserves particular attention in manufactured homes, tightly constructed houses, basements, and homes with strong kitchen hoods, clothes dryers, bath fans, or other exhaust equipment. The approved intake should also be placed where debris, pests, or drifting snow will not block it. VIO Chimney’s installation overview likewise identifies outside air, house pressure, exterior openings, grade, eaves, utilities, vegetation, and snow exposure as route-planning considerations that require site-specific review.
Do not assume that adding outside air cures every pressure or venting problem. Wind exposure, altitude, elbows, long horizontal runs, and house depressurization can affect performance. These conditions call for model-specific vent design and, where necessary, qualified assessment—not a universal pipe-length rule.
Do not cut a wall, ceiling, or roof until the complete route is settled. Confirm the pass-through components, structural implications, vent compatibility, approvals, terminal position, and responsibility for firestopping and weatherproofing first.
Compare Sidewall, Vertical, and Existing-Chimney Venting
A pellet stove needs a compliant exhaust system, but it does not necessarily need a conventional masonry chimney. Depending on the appliance listing and site, approved options may include a sidewall terminal, an exterior vertical run, an interior route through the roof, or a liner through an existing chimney.
No route is universally best.
| Route | Building penetrations | Exposure and maintenance | Typical complexity | Important qualifications |
|---|---|---|---|---|
| Direct sidewall | One exterior-wall penetration | Terminal is weather-exposed and may be easy to reach | Often the least building work | Must be expressly permitted; terminal placement and outage behavior require careful review |
| Through wall, then vertically outside | Wall penetration plus exterior supports and termination | Exterior pipe is exposed to weather; cleanouts may be accessible | More components than a short sidewall route | Must meet route, support, clearance, and equivalent-length requirements |
| Interior vertical through roof | Ceiling, attic, and roof penetrations may be involved | Less exterior pipe, but roof access and flashing matter | Greater structural and weatherproofing complexity | Requires approved ceiling and roof components plus a planned cleaning route |
| Existing chimney with liner | Usually uses an existing vertical shaft | Chimney and liner must remain inspectable and serviceable | Condition-dependent; repairs can expand scope | Chimney must be suitable, and the liner must be approved, compatible, and correctly sized |
| Fireplace insert with liner | Primarily within fireplace and chimney, with top termination work | Connection may be concealed behind the insert | Often specialist work | Fireplace compatibility, chimney condition, liner, adapter, and termination all require verification |
Elbows and horizontal sections add resistance, but that does not justify applying a generic limit. Vent diameter, equivalent-length calculations, elbow limits, required rise, support spacing, and joint treatment are specific to the appliance and vent system.
Use only approved pellet vent
Never improvise pellet-stove exhaust with dryer vent, PVC, HVAC ductwork, Type B gas vent, or other unapproved pipe. Ordinary single-wall stove pipe is not a safe default.
Pellet appliances use mechanically assisted exhaust. The vent must contain combustion gases, fine ash, and water vapor without leaking into the building. Joints may therefore need a gas-tight, pressure-resistant assembly, with fastening and sealing performed exactly as the stove and vent manufacturers specify. Pellet Fuels Institute guidance excludes materials such as dryer vent, Type B gas vent, and PVC from pellet-appliance venting and explains the importance of approved vent materials and gas-tight assembly for mechanically assisted exhaust.
Do not choose sealant by color, temperature label, or a forum recommendation. Use only the joint method and any sealant identified for the exact appliance and vent system.
Consider shutdown and power-outage behavior
During a power failure, powered pellet delivery generally stops, but pellets already in the burn pot can continue burning or smoldering. Exhaust behavior then depends on the stove and vent configuration. A route with little natural draft may be more vulnerable to smoke spilling indoors under some outage, component-failure, wind, or depressurization conditions. Pellet Fuels Institute guidance specifically advises considering vent layout and unexpected-shutdown behavior rather than assuming all approved routes behave identically during a loss of power.
That does not prove every stove needs a vertical route, nor does it make sidewall venting inherently defective. It means outage behavior belongs in the design review. Ask what the appliance manual says about unexpected shutdown, whether the approved route includes vertical rise, and how the system should behave if the combustion fan stops.
Choose the route only after weighing:
- Approval for the exact appliance
- Total vent resistance
- Building penetrations
- Exterior wind, cold, rain, and snow exposure
- Chimney condition
- Cleaning access
- Shutdown and outage behavior
- Structural and weatherproofing scope
- Local approval requirements
- Installed cost
Understand the Freestanding and Insert Installation Workflows
The following workflows are project maps, not instructions for cutting, framing, wiring, flashing, or modifying a chimney. Those tasks depend on the building, appliance, approved components, and applicable trade requirements.
Freestanding pellet-stove workflow
- Verify the appliance, location, and approvals. Confirm the model, listing, manual, permit path, insurer requirements, proposed configuration, and warranty conditions.
- Construct or verify the floor protection. Match its dimensions, extensions, materials, thickness, and thermal performance to the manual.
- Position the stove to its listed clearances. Include clearances to trim, furniture, walls, ceilings, and vent components.
- Survey the full vent route. Check every interior cavity and exterior termination conflict before opening the building.
- Install the specified pass-through components and approved vent system. Use the listed thimble, ceiling support, firestop, flashing, or other components required for the route.
- Support, fasten, and seal the vent as directed. Follow both the stove and vent-system instructions.
- Install outside combustion air when required. Use approved components and protect the intake from blockage.
- Connect approved grounded power. Meet the model’s receptacle, circuit, grounding, polarity, and location requirements.
- Complete inspection and manufacturer-directed startup.
A wall or roof penetration may involve structural framing, clearances within concealed cavities, firestopping, flashing, and weatherproofing. A generic installation article cannot define those details safely for a particular house.
Fireplace-insert workflow
- Verify compatibility. Confirm that the insert is approved for the fireplace type, opening, hearth, chimney, and installation method.
- Clean and internally inspect the fireplace and chimney. A homeowner’s view from the firebox does not replace an appropriate internal inspection.
- Repair defects. Address damaged masonry, moisture intrusion, obstructions, or structural concerns before covering the area with an insert.
- Select the specified liner and adapter. Confirm material, size, insulation requirements, listing, and compatibility with the insert.
- Install the liner system and approved top termination.
- Position and connect the insert. Ensure the connection can be inspected or serviced as required.
- Provide required outside air and electrical power.
- Complete inspection, test-fire, and the operating walkthrough.
Do not assume a large open masonry flue is a suitable direct exhaust path. A pellet insert commonly uses a correctly sized, compatible listed liner; the appliance manual may require partial or full relining. Similarly, a metal fireplace or fire chamber is not automatically suitable for an insert. The relevant listings and instructions must expressly permit the combination.
Existing-chimney checklist
Before relying on an existing chimney, determine:
- Has it been cleaned?
- Are deposits, nests, debris, or other blockages present?
- Are clay tiles cracked, displaced, or missing?
- Is mortar missing or deteriorated?
- Is there evidence of water entry or freeze damage?
- Is the masonry structurally sound?
- Is a factory-built chimney complete and composed of compatible listed parts?
- Is the proposed liner approved for the appliance and chimney?
- Is the liner correctly sized under the model instructions?
- Is liner insulation required?
- Can the liner and connection be cleaned and inspected later?
- Does another fuel-burning appliance share the flue?
- Are the top plate, cap, and termination compatible with the system?
Existing chimneys may need cleaning, internal inspection, repair, and a properly sized listed liner before use. VIO Chimney’s commercial installation overview identifies deposits, debris, cracked tiles, missing mortar, water damage, and blockages among the conditions to assess before liner installation.
Stop work if you encounter hidden wiring or plumbing, uncertain framing, damaged masonry, an obstructed chimney, incompatible components, or instructions that do not clearly authorize the planned assembly. Obtain a qualified assessment before continuing.
Decide Between DIY and Professional Installation
A homeowner may be allowed to install a pellet stove in some jurisdictions. That does not automatically make owner installation legal at your address, safe for the proposed configuration, acceptable to the insurer, or compliant with the warranty. Permit, inspection, and warranty conditions vary, and commercial cost guidance from Thumbtack likewise cautions that local requirements and manufacturer conditions must be checked for the actual project rather than assumed.
Use a narrow DIY test. A project is a possible DIY candidate only if all of the following are true:
- The local authority confirms that owner installation is permitted.
- Required permits and inspections will still be completed.
- The appliance and vent instructions are complete and understood.
- The selected route is straightforward and expressly approved.
- Every component is listed and mutually compatible.
- The existing hearth, wall, roof, fireplace, or chimney has been properly assessed.
- No structural, masonry, roofing, or electrical work exceeds the homeowner’s competence.
- The installer can identify concealed hazards before cutting.
- The finished system can be inspected, tested, cleaned, and serviced.
- Insurance and warranty conditions have been checked in writing.
If any answer is “no,” “not sure,” or “I assume so,” the project is not ready for DIY installation.
When to escalate to a professional
| Project condition | Why qualified help is prudent |
|---|---|
| Fireplace insert | Requires compatibility checks and often liner, adapter, and confined connection work |
| Existing chimney | Internal condition, sizing, repair, and liner requirements may not be visible |
| Chimney relining | Requires compatible materials, correct sizing, termination work, and cleaning access |
| Roof penetration | Adds fall exposure, structural detailing, flashing, and weatherproofing |
| Damaged masonry or water intrusion | Scope may extend beyond appliance installation |
| Structural modification | Framing changes require building-specific assessment |
| New or altered electrical work | Must meet appliance and local electrical requirements |
| Manufactured-home installation | Requires an approved appliance and additional model- and jurisdiction-specific provisions |
| High altitude or unusual wind exposure | May affect combustion-air and vent design |
| Tight or depressurized house | Exhaust fans and low infiltration can interfere with operation |
| Unclear code, listing, or component compatibility | Guesswork is not an acceptable resolution |
Professional assistance does not relieve the homeowner of oversight. Verify who obtains permits, what chimney or vent work is included, which components will be used, who schedules inspection, and what final records will be delivered.
Questions to ask prospective installers
Ask each bidder:
- What licensing is required here, and do you hold it?
- Can you provide current liability-insurance information?
- Do you hold relevant hearth or chimney certifications?
- How much experience do you have with pellet appliances?
- Have you installed this exact brand and model?
- Will you work from the current appliance and vent manuals?
- Who obtains the permits and schedules inspections?
- Who inspects, cleans, repairs, or relines the chimney?
- Who handles electrical work?
- Who is responsible for wall or roof weatherproofing?
- What startup tests and owner instruction are included?
- What is covered by the workmanship warranty?
- Who supplies service parts or handles future repairs?
- What conditions would trigger a change order?
Where practical, obtain at least three detailed written quotes. Angi’s hiring guide also recommends comparing at least three proposals and examining scope, materials, credentials, timing, and payment terms before signing a contract.
The contract should identify:
- Stove manufacturer and model
- Vent, adapter, and liner components
- Hearth and wall-protection work
- Outside-air work
- Electrical work
- Wall, ceiling, or roof penetrations
- Firestopping, flashing, and weatherproofing responsibilities
- Chimney cleaning, inspection, repair, and relining
- Permits and inspections
- Labor and materials
- Explicit exclusions
- Cleanup and disposal
- Project timeline
- Payment schedule
- Manufacturer and workmanship warranties
- Change-order process
Do not accept “installed” as a complete scope description. Also do not assume professional installation automatically protects the manufacturer’s warranty; read the warranty terms for the exact model.
Build a Realistic Installation Budget
Pellet-stove installation prices vary too much for one national number to function as a quote. As one broad commercial benchmark, Thumbtack published an estimated range of $714 to $3,864, while warning that location, layout, venting, labor, permits, and project complexity can materially change the result in its 2026 pellet-stove cost guide. Treat that range as an orientation point, not a promised price.
Build the budget from the actual scope:
- Appliance and selected options
- Freight, delivery, and placement
- Listed pellet-vent components and adapters
- Chimney liner, insulation, top termination, or repairs
- Chimney cleaning and inspection
- Hearth construction or modification
- Outside-air kit and routing
- Electrical inspection, repair, or new work
- Wall, ceiling, attic, or roof work
- Structural modifications
- Flashing and weatherproofing
- Professional labor
- Permit and inspection fees
- Removal of an old appliance
- Cleanup, disposal, and taxes
- Contingency for concealed conditions
A straightforward approved sidewall project may cost less than an interior roof route or chimney restoration because it can involve fewer components and less building work. But the cheapest route is not automatically permitted, suitable for the site, or satisfactory during an outage. Design the compliant system first, then price it.
Compare quotes on the same basis
Use a table that makes omissions visible:
| Scope item | Quote A | Quote B | Quote C |
|---|---|---|---|
| Exact stove and options | |||
| Delivery and placement | |||
| Hearth work | |||
| Vent brand, listing, and components | |||
| Chimney inspection and cleaning | |||
| Liner, adapter, insulation, and cap | |||
| Outside-air system | |||
| Electrical work | |||
| Wall or roof penetration | |||
| Flashing and weatherproofing | |||
| Permit and inspection fees | |||
| Startup and owner walkthrough | |||
| Removal and disposal | |||
| Taxes | |||
| Explicit exclusions | |||
| Allowances | |||
| Total installed price | |||
| Workmanship warranty |
This prevents a labor-only proposal from appearing cheaper than a complete installed price. Request written allowances or separate line items for conditions that cannot be priced until the building is opened or the chimney is inspected, including:
- Concealed chimney defects
- Masonry repairs
- Structural framing repairs
- Electrical upgrades
- Additional liner or vent components
- Permit-driven revisions
- Difficult access or equipment rental
Reasonable ways to control cost include comparing detailed quotes, defining the scope before work begins, considering off-season scheduling, avoiding appliance features you do not need, and bundling related hearth or chimney work when that produces a clearer and more efficient project. Do not save money by substituting unapproved vent parts, deleting inspections, or choosing a terminal location merely because it requires less pipe.
Finally, include ownership costs. Vent cleaning, routine supplies, replacement wear parts, and periodic professional service continue after installation. Good cleanout and service access may cost slightly more to create, but poor access can make every later visit harder and encourage neglected maintenance.
Inspect, Test, and Document the Stove Before Routine Use
Installation is not complete when the last pipe section is attached. It is complete when the required approvals are closed, the system has been verified against its instructions, alarms are operating, and startup produces no sign of unsafe performance. General pellet-stove safety guidance calls for verified clearances, floor protection, supported and sealed venting, grounded power, working smoke and carbon-monoxide alarms, and manufacturer-directed startup checks before routine use.
Final installation checklist
Before the first regular fire, verify:
- Required permits have been finalized.
- Required inspections have passed.
- The installed appliance is the approved model.
- The stove is positioned to all required combustible clearances.
- Floor protection matches the required dimensions and thermal specification.
- Vent components are listed for pellet use and compatible with one another.
- Adapters, thimbles, supports, firestops, flashing, and termination components are correct.
- Vent joints are fastened, locked, and sealed as specified.
- The vent is adequately supported.
- The termination is in an approved location.
- Cleanouts and inspection points remain accessible.
- Outside combustion air is installed where required.
- The intake and exhaust are not confused or improperly combined.
- The chimney has been cleaned, inspected, and repaired where applicable.
- The liner is correctly sized, compatible, and terminated as specified.
- The stove has an appropriately located grounded receptacle.
- Any model-specific circuit, breaker, voltage, polarity, or electrical requirements are satisfied.
- Required wall, roof, and exterior weatherproofing is complete.
- The appliance can be loaded, cleaned, and serviced safely.
Working smoke and carbon-monoxide alarms should be installed and tested according to local requirements and their manufacturers’ instructions. Do not treat an alarm as a substitute for correct venting; it is an additional layer of protection.
Conduct the specified test fire
Follow the manufacturer’s startup and commissioning procedure. Do not invent a universal draft number, flame appearance, feed setting, or combustion threshold. The correct checks depend on the model.
During startup and shutdown, watch for:
- Visible smoke or exhaust escaping from joints
- Smoke entering the room
- Odors or symptoms that suggest exhaust leakage
- Failure to establish the flame described by the manufacturer
- Abnormal control messages or shutdowns
- Unusual fan, auger, or ignition behavior
- Smoke entry after fuel feed stops
- Exterior terminal blockage or recirculation concerns
Do not dismiss suspected exhaust leakage as normal startup behavior. If smoke, exhaust, abnormal controls, or unsafe shutdown behavior is suspected, stop operating the stove and obtain qualified evaluation.
Require an owner walkthrough
The installer or inspector should explain:
- Normal startup
- Flame and control behavior
- Normal shutdown
- What happens during a power failure
- How to respond to an alarm or failed ignition
- Burn-pot and ash-area access
- Vent and cleanout access
- Safe ash handling
- Required cleaning intervals
- Periodic service tasks
- Parts or panels the owner should not disturb
- How to arrange warranty or service work
Retain a permanent file containing:
- Appliance installation and operating manual
- Vent and liner instructions
- Component listings and product records
- Permit applications and final approvals
- Inspection reports
- Contract and change orders
- Invoices and payment records
- Appliance and workmanship warranties
- Model and serial numbers
- Startup or commissioning records
- Chimney inspection and repair records
- Photographs of concealed work before it was covered
Plan routine cleaning and periodic professional service from the beginning. A well-designed installation keeps ash traps, cleanouts, vent sections, and service panels reachable. If access is awkward, maintenance becomes slower, more expensive, and easier to postpone.
Frequently Asked Questions
Can I install a pellet stove myself?
Possibly, if the local jurisdiction confirms that owner installation is permitted and the project is genuinely straightforward. You must still follow the exact appliance and vent-system instructions, use listed compatible components, obtain required permits, and pass required inspections.
DIY is a poor fit when the project involves a fireplace insert, chimney liner, roof penetration, damaged masonry, structural changes, new wiring, a manufactured home, unusual wind or altitude exposure, house-depressurization concerns, or uncertainty about code and listing requirements. Check the appliance warranty and homeowner-insurance conditions before deciding.
Does a pellet stove need a chimney, or can it vent through a wall?
A pellet stove needs a compliant exhaust system, but not necessarily a conventional masonry chimney. Some freestanding models permit approved sidewall venting; others may use an exterior vertical run, an interior route through the roof, or a suitable existing chimney with an approved liner.
The appliance manual determines which routes are permitted. A short wall route should not be assumed acceptable merely because another pellet stove uses one. Terminal clearances, vent resistance, required rise, component compatibility, weather exposure, and outage behavior must all be checked.
Does a pellet stove need an outside-air kit?
Sometimes. Outside combustion air may be required by the appliance listing, local requirements, home type, installation location, or pressure conditions. It deserves particular attention in manufactured homes, tight houses, basements, and homes with strong exhaust fans.
The outside-air intake is separate from the exhaust vent. Use only the kit and route approved for the appliance, and place the intake where pests, debris, or snow will not block it. Do not assume outside air is always optional—or that it automatically solves every draft problem.
Do I need a permit or inspection to install a pellet stove?
Requirements vary by jurisdiction, so contact the local building or mechanical authority before buying components or cutting an opening. Depending on the project, approvals may involve mechanical, building, chimney, or electrical work.
For example, Portland requires a mechanical permit and inspection for pellet-stove installation and may require an electrical permit for associated wiring, but those rules are specific to that city and should not be generalized elsewhere from Portland’s permit and safety guidance. Also ask your insurer whether it requires notice or final documentation.
How much does it cost to install a pellet stove?
The total depends on the appliance, delivery, vent route, chimney condition, liner needs, hearth construction, outside-air provisions, electrical work, structural access, labor, permits, inspections, removal, and local market.
Use the commercially sourced range cited in the budget section only as an orientation point. Request project-specific written quotes that separate the stove, venting, liner or chimney work, hearth, electrical work, permits, delivery, labor, and removal. Also budget for future vent cleaning, replacement parts, and periodic service.
Installing a pellet stove is not merely a matter of placing an appliance and attaching pipe. It is a coordinated safety, building, electrical, venting, approval, and maintenance project. Complete the manual-first worksheet, confirm the permit path, choose an expressly approved configuration, and obtain qualified help for chimney, roof, structural, electrical, manufactured-home, or pressure-related complications.
The final readiness test is simple: do not put the stove into routine service until the installation matches the appliance and vent instructions, required approvals are complete, alarms work, and the manufacturer-directed test fire shows no sign of exhaust leakage or unsafe performance.