
Find the Fault by Following Your Stove’s Startup Sequence
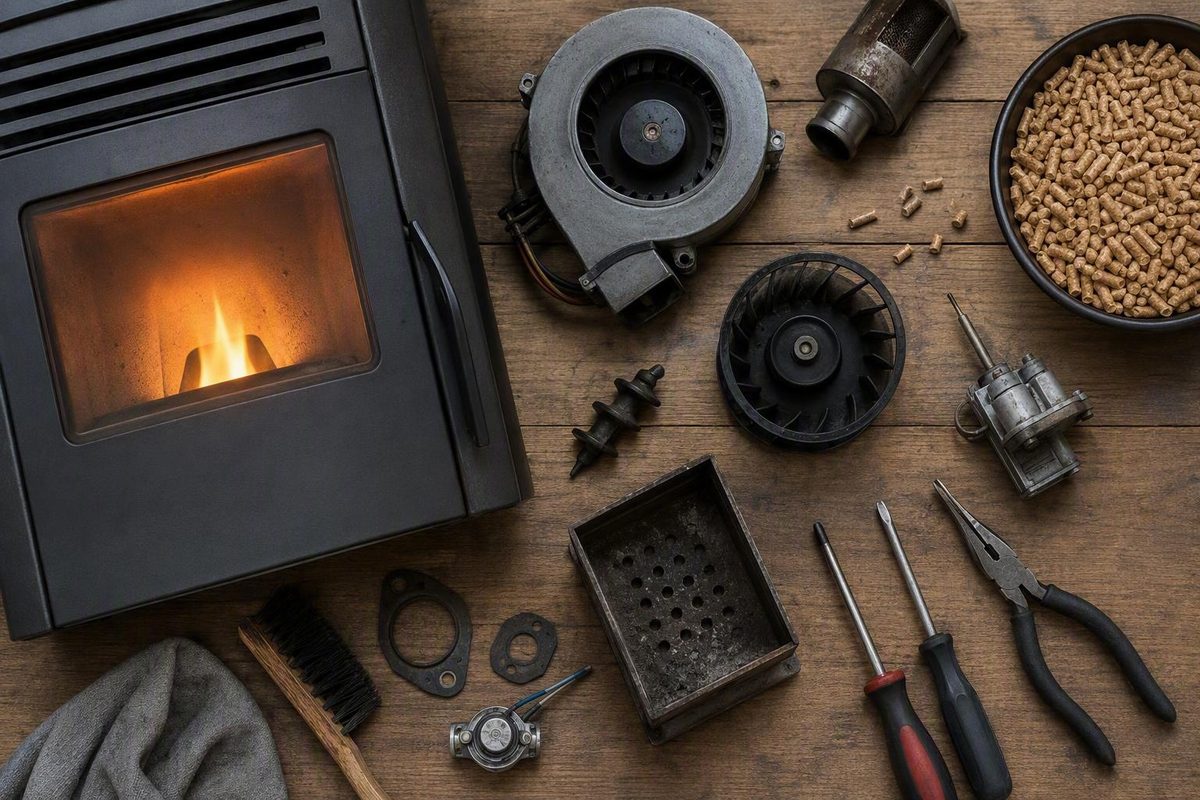
A pellet stove does not simply turn on. It moves through a chain of events: the controls request heat, the exhaust blower establishes airflow, safety circuits approve operation, pellets enter the burn pot, the igniter starts the fire, and a sensor confirms that combustion is sustainable. If one stage fails, the controls may prevent the next stage from happening.
This guide covers routine troubleshooting and owner-permitted maintenance. It is not emergency-response guidance. Persistent smoke entering the room, electrical burning odors, damaged wiring, abnormal overheating, failed combustion blowers, or repeated safety trips are reasons to stop troubleshooting rather than continue experimenting.
Start safely and record exactly what the stove is doing
Before opening a panel, clearing a blockage, or changing a setting, separate observation from maintenance.
You can observe a normal startup while the stove remains assembled: listen for blowers, watch for pellet delivery through the normal viewing area, note whether a flame forms, and record the displayed code. Do not open the firebox, reach into the stove, touch internal surfaces, or defeat a closure switch during startup.
Cleaning and maintenance require a different process. Use the stove’s normal shutdown control, allow the complete shutdown and cooling cycle to finish, and then disconnect electrical power before beginning any owner-permitted work. General pellet-stove guidance specifically warns against unplugging a running stove or deliberately running it out of pellets as a routine shutdown method because the programmed shutdown may continue operating blowers while remaining fuel burns and the appliance cools (pellet-stove startup and shutdown guidance).
Once the stove is completely cool, unplug it before cleaning or maintenance. Do not assume that a surface is safe to touch merely because the visible flame is gone. Follow the manufacturer’s procedure for accessing the burn pot, ash compartments, hopper, cleanouts, or other owner-serviceable areas (Pellet Heat’s troubleshooting precautions).
Never bypass, disconnect, jumper, tape closed, or manually hold a protective switch to make the stove run. Door, hopper-lid, vacuum, pressure, high-limit, and related devices can interrupt ignition or feeding when a required condition is absent. Treat a switch-related shutdown as a condition to investigate under the model manual—not an obstacle to defeat.
Stop owner troubleshooting and arrange qualified inspection if you find:
- Persistent smoke entering the room
- An electrical or burning-insulation odor
- Melted connectors, exposed wiring, or visibly damaged insulation
- Abnormal overheating or heat-related discoloration
- A combustion or exhaust blower that does not operate
- Repeated high-limit or other safety trips
- Suspected vent leakage
- A restriction that cannot be reached through an approved cleaning procedure
- A persistent sensor, pressure-circuit, motor, or control-board error
- Any condition that requires exposed-wiring work, electrical measurements, or safety-circuit testing
Before changing anything, create a fault record. Write down:
- Make, model, and serial number
- Error number, message, or exact blink pattern
- Whether the display is dead or illuminated
- The last startup stage that completed
- Elapsed time from the start command to failure
- Sounds from the exhaust blower, room blower, and auger
- Whether pellets dropped and whether feeding continued
- Whether a flame formed and what it looked like
- What remained in the burn pot after normal shutdown and complete cooling
- Pellet brand or type, bag condition, and visible dust
- Date and scope of the last cleaning
- Recent fuel changes, power interruptions, repairs, or setting changes
Photograph the display, visible flame, and cooled burn-pot contents when useful. Do not open an operating stove merely to improve the photograph.
Finally, find the manual for the exact model and revision. It should control shutdown, access, cleaning points, error-code meanings, reset procedures, approved adjustments, maintenance intervals, and owner-serviceable parts. Generic switch locations and blink-code charts may not apply even to another model from the same manufacturer.
Run the prioritized first-check routine
Begin with quick external observations. Cleaning and internal inspection come only after the stove has completed its normal shutdown, cooled completely, and been unplugged. Do not impose a time limit on cooling.
-
Confirm the heat request. Check that the plug is seated, the stove’s power control is on, and the household breaker or user-accessible fuse specified by the manual has not opened. If a thermostat controls the stove, confirm that it is set to heat and requesting a temperature above room temperature.
-
Record the display before resetting anything. Write down the exact code, words, or blink pattern. Look up the meaning in the manual for the precise make, model, and control system. Codes are not standardized.
-
Check the hopper and fuel. Make sure there are enough pellets to reach the feed opening. Look for a hollow area above that opening, excessive sawdust, unusually long pellets, or visible foreign material. Damp pellets may appear swollen, soft, clumped, or musty. Fuel condition can disrupt feeding or ignition, but it is only one variable.
-
Close the firebox door and hopper lid normally. Remove visible material caught on accessible mating surfaces and close both fully. Do not press or hold a switch manually to force operation.
-
After cooling and unplugging, clean the burn pot. Follow the manual’s procedure to remove loose ash and deposits. Confirm that the pot is seated correctly and that its existing combustion-air holes are open. Do not modify the pot or enlarge its holes.
-
Inspect approved airflow areas. Check owner-accessible air inlets, ash traps, cleanouts, and the exterior vent termination for obvious restrictions. Do not separate sealed vent joints or dismantle concealed piping unless the manufacturer assigns that work to the owner.
-
Reassemble and try one controlled restart. Restore all approved covers and cleanouts, close the door and hopper lid, reconnect power, and observe one ordinary startup. If the same safety code returns, record it rather than repeatedly resetting the stove.
This checklist may correct an external control, fuel, closure, cleanliness, or accessible-airflow problem. It is not a promise that every fault has a simple fix. If the problem remains, determine where the startup sequence stops instead of ordering parts by symptom alone.
Follow the startup sequence to locate the failure stage
Startup order, timers, sensor types, feed pulses, and displayed messages vary by manufacturer and model. Use the following sequence as a diagnostic framework, not as a substitute for the manual.
A typical startup progresses broadly through:
- Start command or call for heat: The control receives a manual command or thermostat request.
- Exhaust airflow: The combustion or exhaust blower begins moving air through the appliance and vent.
- Safety approval: A pressure, vacuum, closure, or related circuit confirms required operating conditions.
- Pellet delivery: The auger or feed system delivers an initial quantity of fuel.
- Ignition: The igniter heats the ignition area or combustion air.
- Flame establishment: A flame develops while feeding follows the startup program.
- Proof of fire: A model-specific sensor detects sufficient combustion or temperature.
- Run mode: The stove leaves timed startup, regulates fuel and air, and may start or increase the room-air blower.
Commercial troubleshooting guidance describes this general relationship among the exhaust blower, airflow approval, pellet feed, ignition, and proof-of-fire detection while emphasizing that controls and sensors vary by stove.
A stove can therefore have an illuminated display but refuse to feed or ignite. Available power does not mean the controller has received every required safety input. An open door or hopper-lid circuit, inadequate exhaust airflow, a pressure or vacuum fault, or a tripped high-limit control may interrupt the sequence.
Use a timed observation log:
| Stage | What to record |
|---|---|
| Start command | Time the button was pressed or thermostat demand began |
| Exhaust blower | Starts normally, hums, sounds abnormal, or remains silent |
| Pellet drop | Time of first drop, approximate amount, and whether feeding continues |
| Ignition indication | Only visible glow or other indication allowed by the manual while the stove remains assembled |
| Flame formation | Time, size, color, stability, and visible smoke |
| Run transition | Display change and whether the room blower starts |
| Failure | Exact elapsed time and what stopped first |
| Code | Exact number, words, or blink pattern |
Do not treat a lack of visible igniter glow as proof that the igniter has failed. Some igniters are enclosed or difficult to see. Never touch the igniter, open the firebox, reach inside, or defeat a door switch during operation.
The last successful stage directs the next step:
- Nothing powers up: Continue with the no-power checks.
- The display works, but the exhaust blower does not start: Stop and arrange service.
- The blower runs, but pellets do not drop: Check closures, airflow approval, fuel bridging, and accessible feed restrictions.
- Pellets drop, but no fire forms: Check fuel, burn-pot cleanliness, accessible airflow, and only the igniter procedures approved in the manual.
- A flame forms, but the stove later stops: Consider proof of fire, interrupted feeding, weak combustion, or a safety event.
- The stove reaches run mode but burns poorly: Focus on deposits, airflow, seals, fuel, venting, and authorized settings.
Troubleshoot no power, no start, or no pellet feed
First distinguish a completely dead appliance from a powered stove whose startup has been interrupted.
If the stove is completely dead
Limit homeowner checks to external items:
- Confirm that the plug is fully seated.
- If safe and ordinary for that receptacle, test it with an appropriate known-working household device.
- Check the household breaker or the user-accessible fuse specified by the manual.
- Confirm that the stove’s power control is in the required position.
- Check whether the thermostat is calling for heat.
- Note whether an outage, surge, or recent repair preceded the failure.
If the receptacle has power but the stove remains dead, do not remove electrical covers or probe internal wiring. Internal fuses, switches, wiring, power supplies, and control boards require model-specific diagnosis.
If the display works but startup will not begin
Record the code and determine whether the exhaust blower starts. A live display does not mean the stove has approved ignition or feeding.
Confirm that the firebox door and hopper lid are fully closed. Check only the owner-accessible locations identified by the manual. Do not disconnect a sensor, move wires, bypass a switch, or assume that the control board has failed.
If the stove starts but no pellets drop
After normal shutdown, complete cooling, and electrical disconnection, inspect the hopper from above:
- Is there enough fuel?
- Is there a bridge or hollow area over the feed opening?
- Is excessive sawdust concentrated at the bottom?
- Are pellets unusually long, soft, or swollen?
- Is foreign material visible in an owner-accessible area?
- Does the hopper lid close normally?
Never put a hand or tool into an auger path while the stove is connected to power. The feed system contains moving parts, and internal auger work is not an appropriate live-operation check.
Possible causes beyond the visible hopper include an auger obstruction, feed-motor or mechanism fault, interrupted motor power, unsatisfied vacuum or pressure circuit, blocked exhaust, nonworking exhaust blower, open closure switch, or tripped high-limit control. These are fault categories, not confirmed diagnoses.
If the manual expressly allows the owner to remove an accessible obstruction, follow that procedure only after shutdown, cooling, and unplugging. Stop if access requires exposed wiring, motor removal, unusual force, or dismantling beyond the owner-maintenance instructions.
Arrange professional service for:
- An inaccessible or recurring auger jam
- A feed motor that hums without moving
- No exhaust-blower operation
- Repeated high-limit trips
- A persistent pressure, vacuum, door, or hopper-switch code
- Damaged wiring or connectors
- A suspected motor or control-board fault
Troubleshoot pellets that feed but do not ignite
Pellets in the burn pot establish only that some fuel delivery occurred. They do not show that delivery was correctly timed or sized, and they do not establish that airflow or ignition heat was adequate.
After normal shutdown and complete cooling:
- Replace damp, swollen, soft, or clumped pellets with dry fuel.
- Remove excessive fines through an approved hopper-cleaning procedure.
- Empty accumulated pellets and ash from the burn pot as directed.
- Clear the pot’s existing air holes without modifying them.
- Confirm that the burn pot is installed correctly.
- Clean approved ash traps and accessible air passages.
- Inspect the accessible intake and exterior vent termination.
An ash-filled pot or obstructed holes can interfere with the passage of heated ignition air through the fuel. Restricted combustion airflow can also prevent an initial flame from becoming stable. General ignition guidance therefore prioritizes power, dry fuel, burn-pot cleanliness, vent airflow, and combustion-blower operation before concluding that a component has failed (Angi’s pellet-stove ignition checklist).
During one new startup, observe without opening the stove:
- Does the combustion blower start and sound normal?
- Do pellets arrive before the ignition attempt?
- Is delivery controlled, or does the pot overfill?
- Does an ignition indication permitted by the manual appear?
- Does smoke appear without a sustainable flame?
- Does the control show an error before or after feeding?
No visible igniter glow is only a clue. Some designs conceal the igniter. Conversely, visible heat does not prove correct positioning, airflow, electrical performance, or controller timing.
Consult the exact model manual before accessing, resetting, or replacing an igniter. If it provides an owner procedure for cleaning a defined igniter opening, perform only that procedure with the stove cold and unplugged. Exposed wiring, electrical measurements, blower repair, control-panel diagnosis, and igniter replacement outside documented owner service belong to a qualified technician.
Changing pellets may improve operation when fuel is damp, dusty, or inconsistent, but premium or certified pellets cannot repair a failed blower, obstructed vent, defective sensor, damaged wire, mistimed feed system, or control fault.
Diagnose a stove that lights and then shuts down
Once a flame forms, the control may still need evidence that the fire is established. This stage is commonly called proof of fire. Depending on the model, the stove may monitor exhaust temperature, another temperature point, light, or a different combustion-related input. When the required condition is met, the stove leaves its timed startup program and enters run mode.
Commercial troubleshooting guides cite approximately 15 to 30 minutes as a common proof-of-fire timeout, but that range is not universal. The model manual must determine the actual timer and sensor behavior (proof-of-fire timing guidance).
Failure timing helps narrow the category:
- Shutdown within seconds: An airflow or safety circuit may have interrupted startup, especially if the exhaust blower did not establish the required condition.
- Shutdown after pellets drop but before flame: Examine ignition, fuel condition, burn-pot deposits, and airflow.
- Shutdown after a flame develops: Consider lost proof of fire, interrupted feeding, weak combustion, a high-limit event, or interrupted power.
- Shutdown after run mode begins: Consider intermittent feeding, vent restriction, overheating, blower trouble, unstable power, or a sensor or control fault.
After a normal shutdown and complete cooling, inspect the burn pot:
| Cooled burn-pot condition | Category-level clue |
|---|---|
| Nearly empty | Fuel delivery may have been inadequate or interrupted |
| Full of unburned pellets | Ignition may have failed, or airflow may have been insufficient |
| Partially burned pellets | Power, feeding, proof of fire, or another safety condition may have been interrupted |
| Heavy ash or hard deposits | Combustion airflow may have been restricted |
| Overfilled pot | Fuel may have continued arriving without effective ignition or combustion |
None of these conditions identifies a failed part. An empty pot could result from bridging, a jam, interrupted safety approval, a motor problem, or a controller decision. Unburned pellets could result from damp fuel, blocked air holes, restricted venting, inadequate ignition heat, or unsuitable startup delivery.
Some stoves have a manual-reset high-limit control. Reset it only if the exact model has an owner-resettable device and the manufacturer provides a procedure. A reset may clear a lockout, but it does not correct the overheating, exhaust restriction, airflow problem, or blower fault that caused the trip. If the device trips again, stop resetting it and arrange inspection.
Do not apply a reset method, blink pattern, or switch location from another stove to your model.
Correct weak heat, a lazy flame, black glass, and incomplete burning
A stove can remain lit while combustion quality deteriorates. Common signs include:
- A slow, dark, or lazy flame
- Rapidly blackening glass
- Visible smoke in the firebox
- Excessive ash
- Weak room heat
- Partially burned pellets
- A burn pot that fills faster than fuel burns
- Ignition trouble returning after several cycles
These signs can indicate inadequate combustion airflow, but airflow is not the only variable. Fuel condition, feed rate, door or firebox seals, vent configuration, weather, and model-specific adjustments can also contribute.
Begin with cleaning rather than adjustment:
- Shut the stove down normally.
- Allow it to cool completely.
- Disconnect electrical power.
- Clean the burn pot and open its existing air holes.
- Remove ash from owner-serviceable compartments.
- Clean the ash traps identified in the manual.
- Clear owner-accessible intake paths.
- Service only the vent areas assigned to the owner.
- Reassemble all covers and cleanouts correctly before restarting.
Soot, fly ash, and other deposits can restrict exhaust flow, particularly in vent turns and horizontal sections (Forge & Flame’s airflow and vent-cleaning guidance).
Inspect door and firebox seals visually. Look for a gasket that is displaced, missing, visibly damaged, or preventing normal closure. Do not assume that a universal paper test, gasket size, adhesive, or replacement process applies. Follow the model manual.
Use dry fuel and remove excessive pellet dust. If poor feeding or combustion begins with a new bag or fuel lot, record the change. Fuel may be relevant, but it should not obscure an airflow, feed, blower, or sensor fault.
Damper and feed-rate adjustments are model-specific. A setting that is owner-adjustable on one stove may be factory-set, electronically controlled, or technician-only on another. Change only settings expressly authorized by the manual, and record the original position first.
Stop troubleshooting and request service if:
- Smoke continues entering the room
- You suspect leakage at a vent joint
- The exhaust blower does not operate or sounds abnormal
- A concealed vent section may be blocked
- Poor combustion returns immediately after correct cleaning
- The stove overheats or repeatedly trips a safety device
- Correction would require vent disassembly or electrical work
Know when to call a technician and what repair may cost
Owner troubleshooting should stop where controlled observation and approved maintenance end.
Technician-only work generally includes:
- Exposed-wiring inspection or repair
- Electrical measurements
- Sensor testing or replacement
- Pressure, vacuum, closure, or high-limit circuit diagnosis
- Motor and blower diagnosis beyond approved cleaning
- Control-board work
- Repeated safety trips
- Unresolved venting or draft faults
- Internal auger or feed-system disassembly
- Component replacement not expressly covered as owner service
- Work that may affect warranty coverage
Look for a fireplace or pellet-stove specialist, a qualified stove technician, or a provider authorized for the brand. An appropriately experienced chimney professional may be suitable for vent-related inspection. Professional service may include inspection of the appliance and venting, cleaning, replacement of confirmed failed parts, and operational testing (Angi’s pellet-stove hiring guide).
Before scheduling, ask whether the provider services your exact make and model. Ask about diagnostic fees, travel charges, warranty authorization, parts availability, and whether vent inspection is included.
Provide the technician with:
- Make, model, and serial number
- Exact code or blink pattern
- Last successful startup stage
- Failure timing
- Blower and auger sounds
- Pellet-feed behavior
- Ignition and flame behavior
- Cooled burn-pot contents
- Fuel type and recent changes
- Cleaning and repair history
- Recent outages or electrical events
- Warranty status
A detailed record does not replace diagnosis, but it gives the technician a reproducible symptom instead of a vague report that the stove “sometimes stops.”
Broad repair-cost context
HomeAdvisor lists pellet-stove repair at $150 to $800 overall, with $300 to $500 described as typical and $400 as the national average. Its page is internally inconsistent at the low end: the overview says $150, while body text says $130. These are broad commercial marketplace estimates, not a prediction or quote for a particular stove (HomeAdvisor’s 2026 pellet-stove repair estimates).
The final bill can vary with the stove model, location, labor and travel charges, diagnostic fees, accessibility, vent work, failed-part cost, parts availability, warranty coverage, and the number of faults involved.
Component-price tables are estimates as well. A symptom does not justify ordering the part commonly associated with it. A no-feed condition, for example, could arise from a hopper bridge, airflow lockout, obstruction, switch condition, wiring problem, motor fault, or controller decision.
Repair-versus-replacement decisions should consider the appliance’s overall condition, recurrence of failures, parts availability, warranty, household heating needs, and an actual model-specific estimate. A national average or fixed age threshold cannot make that decision for an individual stove.
Prevent the next breakdown with a manual-led maintenance log
A maintenance log helps distinguish a sudden failure from a gradual change in combustion.
Use a notebook or spreadsheet with fields for:
| Item | What to record |
|---|---|
| Burn-pot cleaning | Date, deposit type, and blocked holes |
| Ash removal | Date and approximate accumulation |
| Hopper cleaning | Dust level, foreign material, and fuel condition |
| Gasket inspection | Door closure and visible damage |
| Accessible blower cleaning | Date and observations, if owner-approved |
| Vent service | Sections serviced and by whom |
| Error codes | Exact code, time, and operating stage |
| Parts replaced | Part number, installer, and date |
| Fuel changes | Brand, type, lot if available, and performance |
| Professional service | Findings, measurements, and recommendations |
Cleaning intervals vary with stove design, operating hours, heat setting, fuel, vent configuration, and manufacturer requirements. General commercial guidance ranges from burn-pot attention daily or as needed to deeper weekly cleaning. One long-term owner account reports scraping the burn pot every few days, removing ash every week or two, and completing a yearly teardown; that is personal experience, not a universal schedule (Pellet Finder’s ownership account).
The manufacturer’s schedule controls. “As needed” may mean more frequent cleaning during prolonged high-output operation or when using ash-heavy fuel. Deep disassembly should be reserved for an approved owner procedure or qualified service.
Periodic professional inspection should follow the manufacturer’s schedule and actual operating conditions rather than an assumed universal interval.
Maintenance is preventive; it is not a substitute for diagnosis. If a lazy flame, rapid soot buildup, difficult ignition, or no-start returns immediately after proper cleaning, do not respond by cleaning more aggressively or making unauthorized adjustments. The recurring problem may involve venting, seals, feeding, blowers, sensors, or controls.
Why does my pellet stove have power but not feed pellets?
An illuminated display shows that some power reaches the stove, but it does not mean startup has been approved. Pellet delivery may be blocked when a door or hopper lid is not closed, required exhaust airflow is absent, a vacuum or pressure condition is unsatisfied, or a high-limit control has tripped.
Also check for low fuel, a pellet bridge, excessive dust, long pellets, and visible foreign material. After normal shutdown, complete cooling, and unplugging, clear only obstructions identified as owner-accessible. An internal auger jam, failed feed motor, persistent safety-circuit code, wiring problem, or nonworking exhaust blower requires professional diagnosis.
Why does my pellet stove light and shut off 15 to 30 minutes later?
That timing can suggest that a flame formed but the control did not register the model’s required proof-of-fire condition before the startup timer expired. It can also reflect interrupted feeding, weak combustion, restricted airflow, a sensor fault, or a safety event. The 15-to-30-minute range is general commercial guidance, not a universal specification.
Record the exact shutdown time and code. Once the stove has shut down normally and cooled, inspect the burn pot. An empty pot may suggest inadequate feeding, while abundant unburned pellets may point toward ignition or airflow trouble. Neither condition confirms a failed component.
Can I reset a tripped high-limit switch?
Only if the exact model has an owner-resettable high-limit control and its manufacturer’s manual provides the procedure. Allow the stove to cool and follow that procedure precisely. Never bypass the switch or alter its wiring.
A successful reset clears a lockout; it does not repair the condition that caused the trip. If the control trips again, stop resetting the stove and arrange inspection for overheating, restricted exhaust, airflow trouble, or blower failure.
How much does pellet-stove repair cost?
HomeAdvisor reports broad marketplace estimates of $150 to $800 overall, with $300 to $500 described as typical and $400 as the average. The same page also gives a conflicting $130 low end in its body text, so these figures should be treated cautiously rather than as a quote (HomeAdvisor’s pellet-stove cost guide).
Actual cost depends on the model, location, diagnostic and travel charges, labor, failed parts, vent work, parts availability, warranty, and repair scope. Obtain a model-specific written estimate before deciding between repair and replacement.
How often should I clean a pellet stove?
Follow the manufacturer’s schedule. The necessary frequency varies with stove design, fuel, heat setting, operating hours, and the amount of ash and deposits produced.
Keep a log and adjust within the manual’s requirements according to actual accumulation. Cleaning that requires deep disassembly, exposed wiring, sealed vent separation, or access beyond the owner-maintenance instructions should be left to a qualified professional.
Final decision path: Shut the stove down normally, allow it to cool completely, and unplug it before maintenance. Check external power and controls, fuel quantity and condition, door and hopper closures, burn-pot cleanliness, and owner-accessible airflow. Reassemble the stove, observe one startup, and record the last successful stage. Use flame behavior, failure timing, model-specific codes, and cooled burn-pot contents only to narrow the fault category. If approved cleaning and model-specific checks do not restore normal operation—or if a safety device trips repeatedly, a blower fails, smoke persists, venting remains restricted, or electrical work is implicated—stop troubleshooting and give a qualified pellet-stove technician the complete observation log.