
Why an Automatic Fuel Nozzle Malfunctions—and When to Replace It
Replacement is the better choice if you cannot identify the model, get an applicable manual, confirm approved parts or perform required post-service tests.
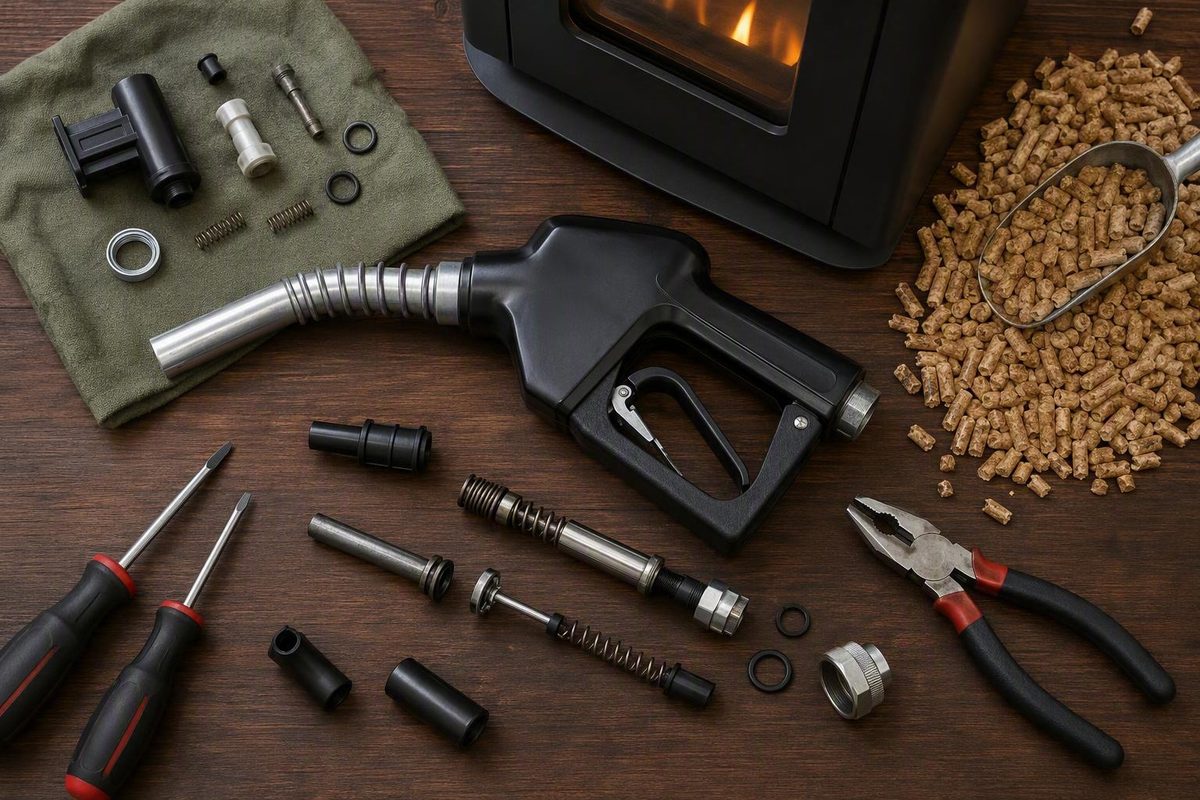
Start Here: A Nozzle That Will Not Stop Is Not Safe to Keep Using
The component itself is called an automatic fuel nozzle or automatic shutoff nozzle.
Before troubleshooting, distinguish between two very different symptoms:
- Premature click-off: The nozzle stops before the tank is full. Splashback, foaming, delivery speed, nozzle position, filler-neck geometry, tank venting, restricted flow, or a blocked sensing path may be involved.
- Failure to shut off: Fuel continues flowing when the tank is full, restarts after stopping, or leaks steadily after the lever is released. Treat this as a serious closure fault, not as an inconvenience to be tested repeatedly during normal fueling.
If fuel does not stop, release the lever immediately and stop the pump or dispenser if that can be done using its normal controls. At a retail station, alert the attendant and avoid the affected dispenser. Continued flow or self-restarting is different from an ordinary early click-off and warrants removing the equipment from use (Oceanworks’ explanation of shutoff malfunctions).
If a spill occurs, stop dispensing and follow the location’s spill-response plan, equipment instructions, fuel-supplier guidance, and applicable reporting requirements.
Fueling must remain attended even when a nozzle has a hold-open latch. The latch reduces hand effort but does not make the automatic mechanism infallible. In one farm-forum incident, an operator stepped away and returned to a spill after the nozzle failed to close. The account is anecdotal and the contributor’s qualifications are unverified, but it illustrates why automatic shutoff should not be treated as permission to leave a transfer unattended (AgTalk’s account of an automatic nozzle failing to stop).
Stop at the first normal automatic click. Repeatedly squeezing the lever can defeat the intended stopping point. In road vehicles, topping off may push liquid fuel into vapor lines or the charcoal canister rather than leaving it in the tank (CLiX Fueling’s automatic-shutoff overview).
Safety boundary
This guide covers symptom identification, non-invasive inspection, system compatibility, and the decision between documented service and replacement. It is not a universal nozzle-rebuild procedure.
- Do not continue normal fueling with a nozzle that fails to close or leaks continuously.
- Keep every test attended.
- Do not override the trip mechanism or modify the sensing opening.
- Do not open or adjust the handle without instructions for the exact nozzle model.
- Follow the pump, tank, hose, nozzle, and site procedures for shutdown, isolation, spills, inspection, and testing.
Because the available evidence does not include service manuals for every gasoline, diesel, farm, truck, aviation, or vapor-recovery nozzle, this article cannot establish model-specific repair steps, technician qualifications, adjustment values, or return-to-service tests. The exact equipment documentation must control.
How Automatic Fuel-Nozzle Shutoff Works
A conventional automatic nozzle senses liquid near the end of its spout. A small sensing opening connects to a narrow air passage or tube leading into the handle.
While fuel flows, a Venturi or similar vacuum-producing feature draws air through that opening. As long as the opening remains exposed, the pressure relationship allows the nozzle to remain open. When rising liquid covers the opening, airflow changes and vacuum increases. The pressure change moves a diaphragm, releases the trigger or hold-open mechanism, and allows the main valve to close.
The functional chain is:
Sensing opening at spout → air tube → Venturi or vacuum source → diaphragm → trip mechanism → poppet or main valve
The tank does not electronically tell the nozzle that it is full. Liquid reaching the sensing opening changes conditions inside the nozzle and mechanically trips the valve.
Conceptual diagram brief: Show a cutaway spout and handle with the six components above labeled. Use one arrow to show fuel moving through the main passage, another to show air moving from the sensing opening toward the vacuum source, and a short sequence illustrating the diaphragm and trip mechanism releasing the main valve. Label the image as a conceptual operating diagram, not a service drawing; construction varies by model.
Understanding this mechanism helps separate two fault patterns:
- A sensing air path that is blocked or behaves as though it is covered can create a false trip and make the nozzle click off too early.
- A main valve or closure mechanism that does not seat can permit continued flow or sustained leakage.
For the vacuum-assist vapor-recovery equipment covered by its troubleshooting bulletin, Husky identifies debris under the poppet as one possible cause of continued flow. The same bulletin associates persistent premature shutoff during its prescribed testing with a blocked automatic-shutoff air path and may direct replacement rather than an improvised internal repair (Husky’s fuel-dispensing troubleshooting bulletin).
Those Husky findings must not be generalized into a repair procedure for an unidentified farm or diesel-transfer nozzle.
A shared operating principle does not make parts, adjustments, or test procedures interchangeable.
Identify the Symptom Before Blaming the Nozzle
“The automatic nozzle does not work” is not a diagnosis. It might mean the nozzle trips too early, never trips, will not open, delivers slowly, works only with certain tanks, or drips after closing.
Use the symptom to decide whether to examine the nozzle, the transfer system, the operating conditions, or the receiving tank.
| Symptom | Plausible causes | Low-risk checks | Remove-from-service threshold |
|---|---|---|---|
| Does not shut off | Sticking or damaged closure mechanism; debris under the poppet in applicable Husky equipment; damaged sensing components; dropped, bent, or binding handle | Release the lever; stop the pump through its normal controls; inspect externally for impact or leakage; identify the exact model and record what happened | Remove immediately if fuel continues, restarts, overfills, or cannot pass the exact manufacturer’s shutoff test |
| Clicks off too early | Splashback; foaming; fast delivery; insertion depth or angle; obstructed sensing air path; restrictive filler geometry; tank or vehicle venting | Inspect the sensing opening externally; try a lower flow setting; modestly reposition the nozzle; note whether the problem follows one tank | Remove if damaged, if it trips abnormally during an authorized test, or if reliable operation cannot be validated |
| Slow flow or will not pump | Restricted filter or approved screen; hose, fitting, swivel, or breakaway restriction; pressure problem on applicable equipment; nozzle restriction; pump limitation | Check filtration, hose routing, fittings, measured output, and pump performance with a known-compatible nozzle | Remove the suspect nozzle if the system performs normally with an authorized compatible substitute |
| Intermittent operation | Changing vertical lift; marginal actual flow; contamination; visible ice or debris; mismatch between nozzle and system | Record the tanks and conditions involved; inspect externally; measure flow under repeatable conditions | Remove if operation remains unreliable or any test results in continued flow |
| Drips after shutoff | Residual fuel downstream of the valve; fuel trapped in the spout; pressure-related drainage; contaminated or damaged closure components | Observe whether the discharge stops after a few drops; inspect for recurring wetness or leakage | Remove for sustained dripping, recurring stored leakage, a growing puddle, or a continuing stream |
| Works with some tanks but not others | Filler height; restrictive inlet; splashback; venting; insertion geometry; changing delivered flow | Compare only with compatible equipment under continuous supervision; record height, angle, and flow setting | Remove if it fails to stop on an appropriate installation or cannot pass its specified tests |
A few drops are not necessarily the same as continued flow. Fuel downstream of a closed main valve can remain in the spout and drain after shutdown. Husky describes a few residual drops this way for the equipment covered by its bulletin. Sustained dripping, repeated wetness while stored, or a continuing stream is a different condition and should not be dismissed as ordinary drainage.
The location of the symptom also matters:
- If one nozzle clicks off early in every suitable receiving tank, the nozzle or transfer system becomes more suspect.
- If several dispensers behave normally except with one vehicle, the vehicle’s filler neck or venting system becomes more plausible.
- If a farm nozzle works at ground level but becomes unreliable when pumping to elevated equipment, changing flow, lift, inlet geometry, or a combination of those conditions may be involved.
These patterns are diagnostic clues, not proof. The objective is to determine whether the fault follows the nozzle, transfer system, operating conditions, or receiving tank.
Safe External Checks Before Any Repair Decision
Begin by identifying the equipment. Record:
- Nozzle manufacturer and exact model number
- Approved fuel or fluid
- Automatic or manual design
- Conventional or vapor-recovery system
- Nozzle inlet size
- Spout diameter, length, and geometry
- Hose inside diameter and length
- Pump model and nominal rating
- Documented operating pressure and flow range
- Filter and screen models
- Swivel, breakaway, meter, valves, and other inline components
- Ambient and fluid conditions when the fault occurs
Do not identify compatibility by appearance or thread fit alone.
Before inspection, shut down and isolate the installation according to the instructions for the pump, tank, dispenser, hose, and nozzle. The evidence supplied for this article does not establish one depressurization procedure suitable for every installation.
Inspect the spout and sensing opening externally. Look for visible dirt, deposits, snow, ice, deformation, or impact damage. Do not insert wire, drill bits, picks, needles, or other objects unless instructions for the exact model expressly authorize a tool and procedure. The supplied sources identify obstruction as a possibility but do not provide a universal mechanical-cleaning method.
Do not apply compressed air merely because a forum comment recommends “blowing out” the internal tube. The available discussions provide no model-specific pressure, connection point, direction, component limits, or validation test. Without those details, they do not support a general compressed-air procedure.
Inspect the rest of the exterior. Look for:
- A visibly bent or deeply damaged spout
- A damaged handle or guard
- A lever that binds or fails to return normally
- Loose or missing exterior hardware
- Visible seal damage
- Fresh wetness around joints
- Recurrent dripping while stored
- A hold-open latch that does not release normally
Visible impact damage changes the decision from routine troubleshooting to manufacturer evaluation or replacement. The evidence does not establish a universal method for judging hidden damage or restoring a bent safety component.
Check the filter and approved pump screens. A restriction can reduce actual output. Clean or replace a component only under its own manufacturer’s procedure and service criteria. An interval suggested by an individual forum contributor is not a universal maintenance schedule; filter life varies with the installation and operating conditions.
Inspect the fuel path. Examine applicable hoses, swivels, fittings, O-rings, valves, meters, and breakaways for visible leakage, crushing, kinks, deterioration, or obvious restriction. Manufacturer troubleshooting for dispensing equipment includes components such as filters, hose O-rings, breakaways, and pressure conditions, but the correct sequence depends on the system.
If contamination is suspected, use only a sampling method and container suitable for the fuel and installation. Visible water or sediment can be a useful observation, but it is not a complete contamination analysis. Forum suggestions such as cutting open used filters do not establish a universally safe or definitive diagnostic procedure.
A comparison with a known-compatible nozzle may help if the equipment manufacturer permits substitution and the change can be made under its procedure. If the system operates normally with the approved substitute but not with the suspect nozzle, the result supports removing the suspect unit for documented service or replacement. A heavy-equipment discussion reported that pump flow returned when an automatic nozzle was removed, but it did not confirm an internal cause or repair method (Heavy Equipment Forums’ nozzle-trouble discussion).
Check Actual Flow and System Compatibility
A pump’s advertised gallons-per-minute rating is not necessarily the flow delivered through the installed nozzle.
Measure output only through a procedure approved for the pump and fluid. Compare the result with the documented operating range for the exact nozzle model, not with a generic online number.
Use this compatibility checklist:
- Measured flow at the nozzle: What does the assembled system deliver under the conditions that produce the symptom?
- Nozzle’s specified operating range: Is the measured output within the model’s documented range?
- Filter condition: Is the filter correct for the installation and within its service criteria?
- Pump-screen condition: Is an approved inlet or pump screen restricted?
- Hose diameter and length: Do they match the pump and nozzle configuration?
- Fittings and accessories: Could adapters, swivels, meters, valves, or breakaways be restricting flow?
- Nozzle inlet size: Is it appropriate for the installed hose and pump?
- Vertical lift: How far upward must the system move fuel?
- Receiving-tank height: Does the problem appear only when filling elevated equipment?
- Tank-inlet geometry: Does the inlet promote foam, splashback, or unstable positioning?
- Fluid and temperature approval: Is the nozzle approved for the fluid and operating conditions?
Restrictions and vertical lift can reduce delivered flow even when the pump’s nominal rating appears adequate. That does not prove that low flow caused the nozzle fault; it establishes a reason to measure the assembled system rather than relying on the pump label.
Farm-equipment forum contributors have associated restricted filters, elevated tanks, and inadequate real-world flow with inconsistent automatic operation. These reports are anecdotal. Contributor qualifications and test conditions are generally unknown, and the actual failed component was not always confirmed.
One discussion described a one-inch automatic nozzle operating unreliably on a three-quarter-inch, nominal 15 GPM pump-and-hose arrangement while a three-quarter-inch nozzle worked. The same discussion contains conflicting estimates of the flow an automatic nozzle requires, so it does not support a universal sizing or minimum-flow rule (AgTalk’s one-inch automatic-nozzle discussion).
Do not conclude from that account that:
- Every one-inch nozzle requires the same pump capacity
- Every three-quarter-inch nozzle will work on a nominal 15 GPM system
- A larger nozzle is always unsuitable for a smaller hose
- Low flow is always the cause of a shutoff malfunction
- One minimum-flow value applies across nozzle designs
The defensible process is:
- Identify the exact pump and nozzle models.
- Obtain their current installation and operating specifications.
- Measure output under the conditions that produce the fault.
- Check filters, approved screens, hoses, fittings, accessories, and lift.
- Compare measured output with the exact nozzle specification.
- Ask the nozzle or pump supplier to review an uncertain combination.
Do not attempt to compensate for a mismatch by defeating the automatic trip, holding the latch in place, altering the sensing opening, or adjusting undocumented components.
Troubleshooting Premature Click-Off Without Defeating the Safety Feature
Premature click-off occurs when the sensing system encounters conditions resembling a full tank before the tank is actually full.
Possible contributors include:
- Fuel splashing over the sensing opening
- Foam reaching the opening
- Delivery that is too fast for the receiving inlet
- A narrow, curved, or restrictive filler neck
- Nozzle position directing fuel against an internal wall
- Visible dirt, snow, or ice at the sensing opening
- Tank venting that causes fuel or vapor to back up
- Interaction between the nozzle and receiving-tank geometry
For an otherwise undamaged nozzle that stops too early, keep the operation attended and try a lower trigger setting. Fully and securely insert the nozzle where the filler design calls for it. If the original position causes splashback, make a modest change in insertion depth or angle while keeping the nozzle stable. General automotive guidance similarly recommends reducing flow and adjusting position for early click-off while treating continued flow as a different, more serious fault (Oceanworks’ guidance on early click-off and shutoff failure).
These are operating checks for premature shutoff only. They are not remedies for a nozzle that continues flowing. Changing flow or angle does not validate a defective closure mechanism.
Do not keep overriding each click. A click is a trip event, not an instruction to continue squeezing until fuel appears. Stop after the first normal click rather than topping off.
If the problem occurs only on one road vehicle, the receiving system may be involved. Professional inspection may need to consider the filler neck, tank venting, vapor lines, charcoal canister, or related components. A nozzle that works on other vehicles is not automatically proven fault-free, but the pattern makes a vehicle-side restriction more plausible.
For farm equipment, record whether the issue is limited to a high, narrow, or sharply angled inlet. Compare behavior only across appropriate receiving tanks and keep every test attended. Note:
- Flow setting
- Pumping height
- Nozzle position
- Temperature
- Visible foam or splashback
- Whether the symptom follows the nozzle or one tank
A problem limited to one restrictive or elevated inlet suggests an interaction among the nozzle, transfer system, and tank. It does not by itself prove an internal nozzle defect.
For the vapor-recovery equipment covered by its bulletin, Husky recommends changing nozzle orientation and reducing flow when diagnosing premature shutoff. If the problem persists during the bulletin’s prescribed test, Husky associates it with a blocked automatic-shutoff air path and may direct nozzle replacement. That test and conclusion are limited to the covered equipment and should not be transferred to an unidentified farm nozzle or an improvised test container (Husky’s model-limited troubleshooting guidance).
If safe operating changes do not resolve the symptom, stop experimenting. Use the exact manufacturer’s troubleshooting process or send the nozzle to an approved service provider. Persistent false trips can reflect a sensing-path problem, component damage, receiving-tank restriction, or operating mismatch that external observation alone cannot distinguish.
Cold Weather, Water, and Contamination
Operators have reported automatic-nozzle problems in freezing weather, but the available accounts do not establish one universal internal failure mechanism.
Conditions worth checking include:
- Visible snow or ice around the sensing opening
- Water or condensation in the fuel system
- Contaminated fuel
- Restricted filtration
- Storage that exposes the nozzle to precipitation
- Use outside the documented temperature range
Do not state as fact that cold weather necessarily stiffens a diaphragm. That explanation appears as speculation in user discussions and has not been established for every nozzle design.
When a problem appears mainly in cold conditions:
- Shut down the equipment under its instructions.
- Inspect the spout and sensing opening externally for visible snow, ice, contamination, or damage.
- Review how the nozzle is stored between uses.
- Follow the tank’s documented water-control and drainage procedures.
- Check the filter and any approved screen against their service criteria.
- Confirm that the fuel and equipment are approved for the operating temperature.
- Keep the nozzle out of service if it cannot be inspected and tested through an applicable procedure.
Forum contributors have reported cold-weather malfunction, filter restriction, sediment, and possible hose debris occurring alongside nozzle problems. These are troubleshooting leads rather than confirmed causes for an unidentified nozzle (Combine Forum’s discussion of automatic-nozzle problems).
Preventive measures can include protected storage, a suitable holster or cover, water control, proper filtration, and maintenance under the tank, pump, filter, hose, and nozzle instructions. Any cover should be used as its manufacturer intends.
Do not improvise thawing with a flame, torch, vehicle tailpipe, hot exhaust, open-element heater, or other uncontrolled heat source. A forum discussion includes a tailpipe suggestion but provides no manufacturer authorization or safety procedure; it should not be treated as validated guidance.
Likewise, do not blow through the sensing path with shop air unless documentation for the exact model specifies the method. The supplied evidence provides no universal pressure, direction, connection point, or post-cleaning test.
If no approved cleaning or thawing procedure is available, leave the nozzle out of service and contact its manufacturer or a qualified fuel-equipment supplier. Replacement is the conservative choice when reliable shutoff cannot be validated.
Repair, Professional Service, or Replacement?
Whether an automatic nozzle can be rebuilt is determined by its exact model and documentation—not by whether its handle can physically be opened.
Use this decision tree.
-
Identify the exact model. - If it cannot be identified, do not order internal parts by appearance. - Ask the manufacturer or supplier to identify it, or select a documented compatible replacement.
-
Classify the symptom. - Continued flow, self-restarting, sustained leakage, or failure to close warrants immediate removal from service. - Premature click-off or low flow may justify non-invasive checks when there is no continued flow, recurring leakage, or visible damage.
-
Inspect for visible damage. - A bent spout, damaged handle, cracked guard, loose component, or binding lever favors manufacturer evaluation or replacement. - Do not assume that reshaping a damaged component restores the nozzle.
-
Check the manufacturer’s service documentation. Service should be considered only when the exact model is supported by: - An applicable service manual - An approved repair kit or parts list - Any specified technician requirements - Shutdown and disassembly instructions - Inspection, adjustment, and assembly criteria - Required post-service leak, flow, closure, and automatic-shutoff tests
-
Determine whether the service can be validated. - If required equipment, test conditions, instructions, or qualified personnel are unavailable, replace the nozzle. - If it fails a required test, it remains out of service.
-
Return it to use only under the manufacturer’s criteria.
The supplied evidence does not support generic instructions for:
- Disassembling the handle
- Cleaning a poppet internally
- Replacing a diaphragm
- Replacing springs or seals
- Adjusting a latch
- Modifying the sensing path
- Setting internal clearances or preload
Those operations may be authorized for particular models, but the parts, tolerances, procedures, and tests are not interchangeable.
Manufacturer troubleshooting may resolve diagnosed internal faults by directing replacement rather than providing a field rebuild. This is particularly important when the symptom is continued flow or when an automatic-shutoff air path remains obstructed after authorized checks.
Replacement is the conservative choice when:
- The nozzle continues flowing after it should stop
- It restarts after tripping
- It leaks repeatedly or drips continuously
- It has visible impact damage
- The spout or handle is bent
- The lever or latch binds
- The sensing opening or spout is damaged
- Its operating conditions cannot be matched to documented limits
- No applicable service procedure is available
- Approved parts cannot be confirmed
- Required post-service testing cannot be performed
- Its behavior remains intermittent or unrepeatable
A manual nozzle may be mechanically simpler, but it is not an equivalent automatic-safety replacement. The operator must control it continuously and release the lever to stop flow. Commercial farm-equipment guidance likewise distinguishes manual operation from automatic shutoff and notes that automatic-nozzle behavior can be affected by foam, blocked vent openings, contamination, and freezing conditions (Mills Equipment’s farm-nozzle comparison).
Before purchasing a replacement automatic nozzle, verify:
- Approved fuel or fluid
- Inlet thread and size
- Spout diameter, length, and geometry
- Hose diameter and length
- Pump or dispenser compatibility
- Specified flow and pressure range
- Temperature rating
- Hold-open features and restrictions
- Vapor-recovery compatibility, where applicable
- Certifications specified for the installation
- Availability of approved service parts
- Manufacturer and supplier support
- Commissioning and shutoff-test requirements
Do not choose solely by inlet size, advertised maximum flow, price, or visual similarity. A nozzle can fit the hose threads while remaining unsuitable for the pump, fluid, operating range, or receiving equipment.
The final rule is symptom-led: an early click may justify careful checks of flow, position, filtration, the visible sensing opening, and the receiving tank. Continued flow or sustained leakage means the nozzle comes out of service. Identify the exact model, compare measured output with its specification, and use only documented service parts and procedures. If those resources are unavailable—or the nozzle is damaged, repeatedly leaks, or fails to close—replacement is safer than an improvised internal repair. Every fueling operation must remain attended.
Can a clogged fuel filter keep an automatic nozzle from working correctly?
A restricted filter can reduce delivered flow and may contribute to slow, intermittent, or unreliable operation. A restricted approved screen, deteriorated hose, undersized fitting, excessive vertical lift, or another limitation in the fuel path can have a similar effect.
That does not mean every shutoff problem is caused by the filter. Check it under the component manufacturer’s procedure, measure output at the nozzle, and compare the result with the exact nozzle specification. If correcting a documented restriction restores flow, the restriction was likely contributing, but a nozzle that previously failed to close or leaked still requires separate evaluation.
Why does the nozzle click off repeatedly even though the tank is not full?
Splashback, foam, fast delivery, nozzle angle, insertion depth, filler-neck geometry, receiving-tank venting, visible contamination, or an obstructed sensing air path can make the nozzle trip early.
Keep the operation attended, try a lower flow setting, and make a modest change in nozzle position. If only one vehicle is affected, have its filler and vapor-control system inspected. If the problem occurs across multiple suitable tanks or persists during a manufacturer-authorized test, remove the nozzle for documented service or replacement.
Do not repeatedly override the click or top off the tank.
Are a few drops after shutoff normal?
They can be. A small quantity of fuel may remain in the spout downstream of the closed main valve and drain after shutdown.
A few drops that stop promptly are different from sustained dripping, repeated wetness while the nozzle is stored, leakage at a joint, or a continuing stream. Treat recurring or sustained discharge as a fault and keep the nozzle out of use until it has been evaluated under the applicable manufacturer procedure.
Can I clean the sensing hole or blow out the internal tube myself?
You can inspect the sensing opening externally for visible dirt, snow, ice, or damage after shutting down the system under its instructions.
Do not insert tools or apply compressed air unless documentation for the exact nozzle expressly authorizes the method. Generic online suggestions provide no universal pressure, connection method, component limit, or validation test. If an obstruction cannot be addressed through an approved procedure, keep the nozzle out of service.
When is replacing the nozzle safer than trying to repair it?
Replacement is also the better choice when you cannot identify the exact model, obtain an applicable manual, confirm approved parts, meet any service requirements, or perform the required post-service tests. A nozzle is not safely repaired merely because it stopped during one informal trial.